Top macOS Tips For New Users
Aadhya Khatri - Aug 09, 2019
If you are a new user of macOS, here are some useful tips to help you break into the new experience
- Best Gaming Phones 2025: Top Devices for Mobile Gaming
- Apple Kills Original HomePod, Focusing On HomePod Mini
- iPhone 12 Color Is Fading Away Quickly And No One Knows Why
If you are a new user of macOS, here are the 10+ useful tips to help you break into the new experience without spending too much time doing everything yourself.
Adjust Mouse And/Or Trackpad Tracking Speed
A slow reacting cursor and mouse will definitely annoy lots of users but unfortunately, that is what you get when first installing macOS. So here is how to speed them up. Access System Preference, then choose Mouse. You will see a slider for changing the speed. Instead of Mouse, heading to Trackpad will lead you to the slider for the trackpad.
Enable Right-Click
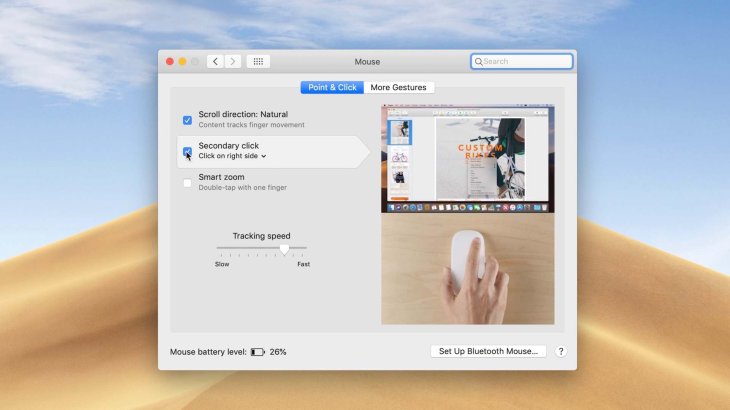
Those you favor the mouse over the trackpad might want to enable it as this feature is disabled by default on macOS. Again, you want to go to System Preference and click on Mouse. Next, enable Secondary click, which will appear when you tap on the Point & Click tab.
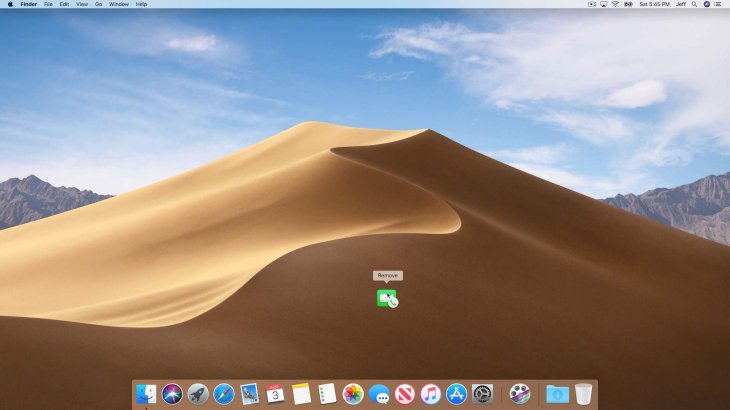
Alter Dock Apps
If you want to remove an app from the dock, what you have to do is to drag it away and hold until you see the Remove indicator appears. When you release the icon, the app will be gone. Another way is to right-click on the app you want and pick Options, then uncheck Keep in Dock.
If you want an app to appear in Dock, first, open it, and then right-click on the app. Now under Options, check Keep in Dock Setting. Another simpler method is to change the position of the app, which tells macOS that you want to keep it in the Dock.
Minimize App Windows Into Dock App Icons
Minimizing apps in macOS means that you will place them between the other apps and the trash. The apps that have been minimized will show previews so that you know what they do. A shortcoming is that this arrangement will make the Dock looks extra complicated.
![]()
If you still want to do so, head to System Preferences and choose Dock. In there, you will find the Minimize windows option.
Add Volume Controls To The Menu Bar
You can always adjust the volume with keyboard or the Touch Bar but if you have the volume controls on the menu bar, that will bring about lots of benefits. This arrangement will allow you to change the volume levels with only two clicks. Click and hold the Option key while clicking on the volume button will allow you to adjust the input device.
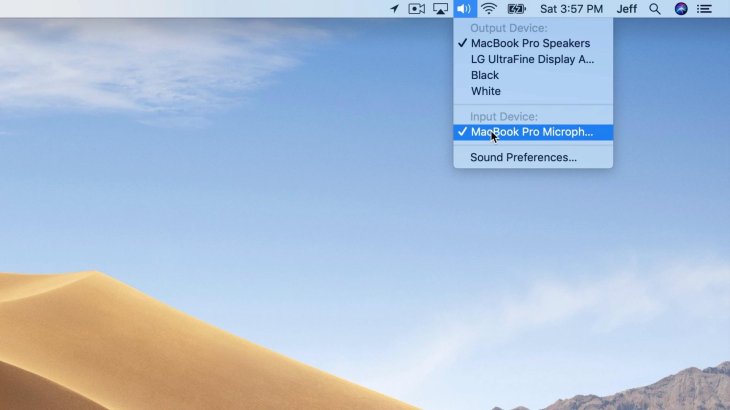
If you want to control the volume right from the menu bar, choose Sound in System Preference, and then tick on the box of Show volume in the menu bar.
Disable Screenshot Floating Thumbnail
The screenshots you take will not show themselves immediately in their default location but will appear as a tiny thumbnail at the corner. While this might benefit lots of users, those who in short of time will not like this feature very much.
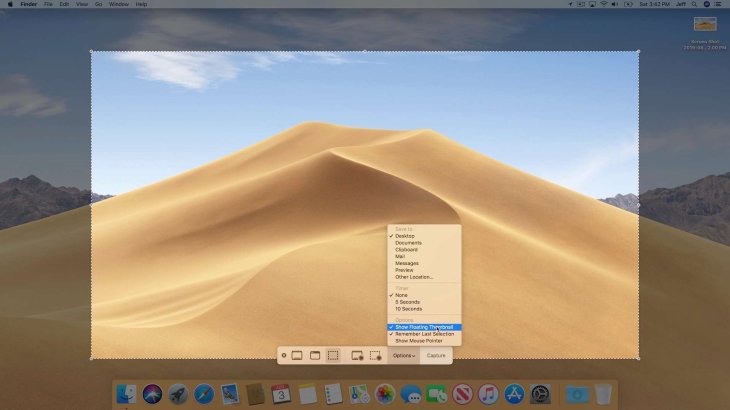
To make the screenshots go directly to their location, first, press Command + Shift + 5. When you see the overlay, choose Options and then remove the tick in Show Floating Thumbnail. Now you will have all of the screenshots in their default location.
Remove Screenshot Shadows
If users do not change anything, screenshots taken with Command + Shift + 4 shortcut in macOS will include shadows.
While these effects look good in many situations, many may like the plain version better. To disable this feature, head to Terminal and do a Defaults Write command:

When you have done the command, here is what to type to restart the SystemUIServer so that the change can be enacted:

If you just want to apply this plain effect on a screenshot-by-screenshot basis, what you have to do is to press the Option key when you take them.
Enable Hot Corners
Hot Corners have won the hearts and minds of many users as they are convenient and time-saving. This feature will help you do keyboard shortcuts just by some movements of the mouse. Since the display has four corners, users will have up to four shortcuts.
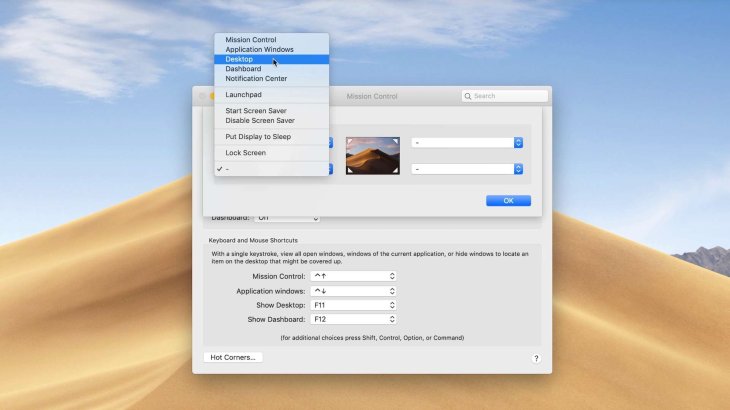
To enable this function, head to System Preferences and choose Mission Control and Hot Corners, which can be found at the bottom left corner. Now all you have to do is to assign a shortcut for each of the corners, including actions like invoking Mission Control, showing the desktop, and putting the display to sleep.
If you find yourself moving files to other locations from the desktop often, you might want to assign Show Desktop shortcut to one of the corners.
Enable Tabbing Between All Controls
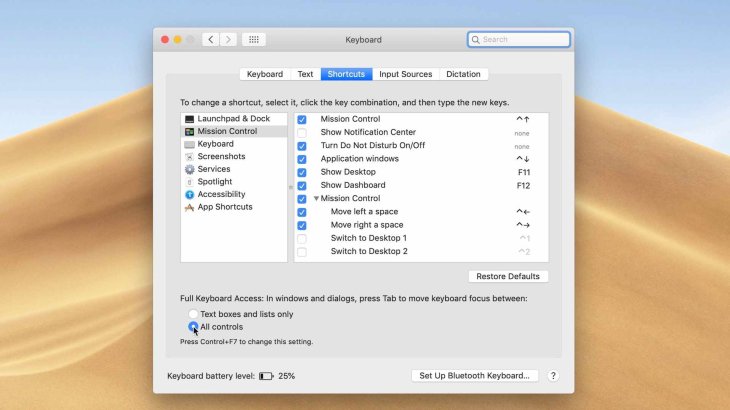
By default, tabbing between controls is limited to lists and boxes in macOS. If you want more actions done, choose System Preferences and click on Keyboard and then Shortcuts. Now, what is left to do is to choose All Controls radio button. After you have enabled this feature, you can now switch between controls just by tapping Tab.
Enable Stacks
Stacks is handy when you need to organize macOS Desktop with only a few clicks of the mouse. Stacks will gather files in collections by theme. Users can make their own stacks or stick to the pre-made ones provided by Apple. To use this feature, all you have to do is to right-click on the Desktop and choose Use Stacks.
Featured Stories

ICT News - Dec 25, 2025
The Visibility Concentration Effect: Why Half the Web Isn’t Qualified Anymore
ICT News - Jul 05, 2025
Windows 11 is Now the Most Popular Desktop OS in the World

ICT News - Jul 02, 2025
All About Florida’s Alligator Alcatraz: A Smart Move for Immigration Control

ICT News - Jun 25, 2025
AI Intimidation Tactics: CEOs Turn Flawed Technology Into Employee Fear Machine

ICT News - Jun 24, 2025
Tesla Robotaxi Finally Hits the Streets: $4.20 Rides That'll Make You Hold Your...

ICT News - Jun 24, 2025
World's First Flying Humanoid Robot Takes Flight

ICT News - Jun 24, 2025
When Closed Source Met Open Source: Bill Gates Finally Meets Linus Torvalds After...
Gadgets - Jun 23, 2025
COLORFUL SMART 900 AI Mini PC: Compact Power for Content Creation

ICT News - Jun 22, 2025
Neuralink Telepathy Chip Enables Quadriplegic Rob Greiner to Control Games with...

ICT News - Jun 20, 2025
Comments
Sort by Newest | Popular