How To Use Split View On Mac
Aadhya Khatri - Nov 18, 2019

For those who use the newer macOS, Split View can be used to open many windows at once. Here is how you can use the feature.
- After 6 Months Of Waiting, Big Sur Is Finally Here, Available Starting November 12
- First Apple Silicon Mac Devices Leaked In macOS's Codes
- How To Download iOS 14 Beta, iPadOS 14 Beta, And macOS Big Sur Beta
What split screen does is to divide your display into two halves so that you can have two different windows opening at the same time. This ability is super handy for those who have to do complex assignments often.
For those who use the newer macOS, Split View does exactly that, but it may require some time to break into. Here is how you can use the feature:
Get Started With Split View
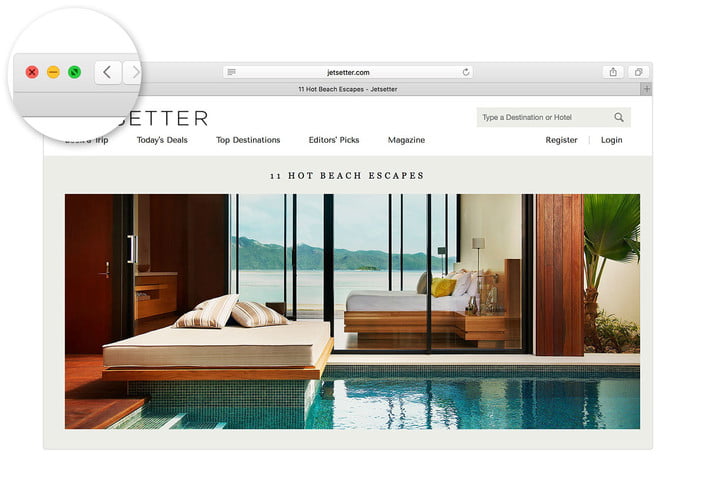
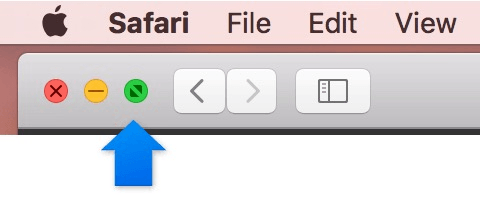
Step 1: Open at least two windows that you want to split the screen for. On one window, find the three-dot icon with green, red, and yellow.
Step 2: Hover your cursor over the green dot, now you will see that it has two arrows. Hold down on it, and you will have some more options to control the window. Choose either Tile Window to Left of Screen or Tile Window to Right of Screen.
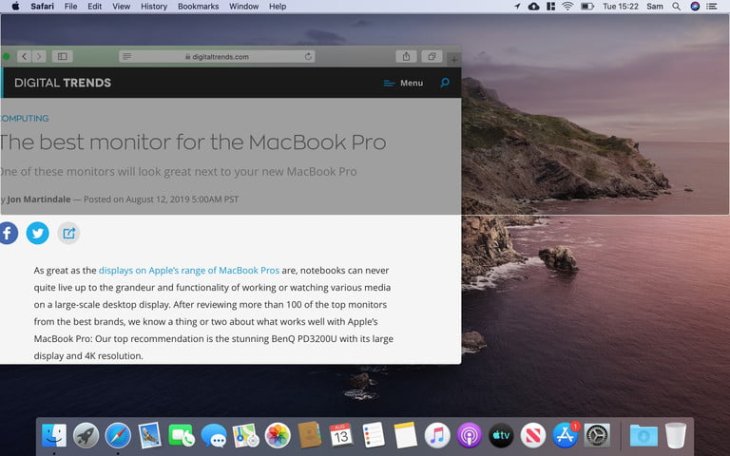
Step 3: You have had one half done, the other window will shrink to fit the other half. If you want to switch focus, all you have to do is to tap on either of these two windows.
If you want to have one window larger than the other, here is what to do. In the middle of the screen, find the black bar. Now click and hold the bar and move it right or left to expand either window. Please note that some apps have a minimum width, so there is no way you can shrink them.
If you want to change the position of the windows, hold the title bar and move it to the new place, the other will switch position accordingly.
In Split View, Mac will automatically hide the menu, but if you need to use it, hover the cursor over the top of the screen, and it will reappear. When you move the pointer, it will disappear again.
When you no longer need the Split View mode, press Esc or choose the green dot, the windows will go back to their original state.
Split View Options
In Option, on some keyboards it is the button labeled Alt, or the green button on a window, you will have three options to choose from, including Move Window to Left Side of Screen, Move Window to Right Side of Screen, Move, and Zoom. The menu bar and Dock will be hidden if you use Enter Full Screen but not Zoom.
Window Snapping
Mac users have finally had window snapping with macOS Catalina. Whenever you drag a window to one of the four corners of the screen, you will see a translucent box indicating the space the window will occupy appearing behind it. If you release, the window will fit right into that box.
With macOS Catalina, you have ten options:
- If you drag a window to one of the four corners, it will fill 25% of the screen.
- When you drag a window to the top part, either on the left or right, it will fill up the top half. Do the same for the bottom part.
- Do the same thing for the right or left part, and the window will fill up that half of the screen.
- To shrink it to fit the middle third, drag the window to the bottom.
- To zoom a window, drag it to the top. Move further up, and you will open Mission Control.
Since Mac gives users several choices when it comes to Split View, it may take a little bit of time to find the most suitable arrangement for you.
Window snapping works differently from Split View. When you drag apps into place, they will not expand to full screen. You cannot change their size either.
A Quick Word About Mission Control
Split View can be handy when you have only two windows opening at once. However, if you have several, Mission Control will give you a more comprehensive view of them all.
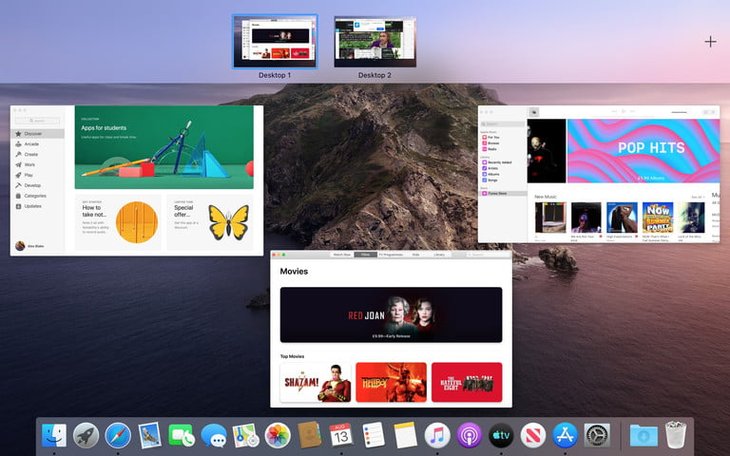
With this mode, you will have a bird-eyes view of all the windows so that you can decide which to work on. It also allows you to make “spaces,” multiple virtual desktops, each of them has its own windows and apps.
To open Mission Control you can use these ways. The quickest and easiest way is to drag a window to the very top of the screen. Another method is to press the F3 Mission Control button on the keyboard. If yours comes with a trackpad, either swipe up with three or four fingers.
Mission Control is another quick way to activate Split View. When you have two windows, open Mission Control and drag one app or window on top of the other.
Cinch, A Third-Party Alternative
If for some reason, you do not want to use the native Split View function, there are other alternatives as well.
Our recommendation is Cinch. This app will create “zones” on the four corners of the screen, and two of them will be on the left and right side. Whenever you want to open several windows at a time, drag them into these zones, and they will snap into place. If you drag it to the corner, the window will occupy 25% of the screen, to the side, and it will fill up a half.
The app comes with a cost of $7 and is available on the App Store or the app’s official website.
Some Features Won’t Work On macOS Mojave
If what you have is macOS Mojave, Split View works the same for the most parts, but there are some differences. The Window snapping will be absent as it is exclusive on macOS Catalina. However, apps like Magnets or Cinch will offer a similar function.
Another difference is that you will not have Move Window to Right Side of Screen, Move Window to Left Side of Screen, Zoom, or Move options.
Featured Stories

How To - Aug 03, 2023
What is the Yo-Yo test in Indian Cricket?

How To - Jul 10, 2023
Top 7 Stats Sites Every Cricket Fan Must Know

How To - Apr 27, 2023
How much does it cost to start an online casino in 2023

Review - Oct 17, 2022
Betting on Sports Events in the Fairplay App

How To - Oct 07, 2022
How to Run a Turnkey Casino Business in 2022?

Mobile - Aug 25, 2022
Beginners' Guide for Online Gambling in India 2022

Review - Jul 26, 2022
Roisea Crypto Exchange: Review from Experts

Review - Jul 15, 2022
WHY BETTING SIGNUP OFFERS ARE IMPORTANT FOR NEW GAMBLERS

Review - Jul 06, 2022
Fairplay club in India

Mobile - Jul 05, 2022
Mahjong Club - Solitaire Game Review: One of the best Puzzle Game in 2022!
Read more

ICT News- Feb 26, 2025
Elon Musk's Federal Workforce Overhaul: AI Takes the Helm
Elon Musk is shaking up the U.S. federal workforce with a drastic measure—leveraging AI to determine who's essential and who's expendable.

ICT News- Feb 25, 2025
Google to Phase Out SMS-Based Authentication Codes
Google is set to discontinue authentication and account recovery via SMS verification codes.

ICT News- Feb 25, 2025
Not Radiation: What Is Causing the Strange Genetic Evolution of Chernobyl’s Dogs?
For years researchers believed that the dogs surviving in the highly radioactive zone of Chernobyl would exhibit strong genetic mutations, helping them adapt to the harsh environment. However, the latest studies have completely...

Features- Feb 26, 2025
Elon Musk Eyes Indian Market: Tesla’s Next Big Move?
Amid slowing global sales and political tensions, Tesla is making strategic moves to enter one of the world’s fastest-growing automotive markets - India.
Review- Feb 27, 2025
Microsoft Surface: A Shift from Innovation to Stability?

ICT News- Feb 26, 2025
Will AI Kill Coding Jobs? The Truth Might Surprise You
For years and now more than ever, we’ve heard that AI is coming for everyone’s jobs—from truck drivers to customer service reps. But what about programmers?
Comments
Sort by Newest | Popular