How To Clear Clipboard: Easy, Simple Process For Anyone
Dhir Acharya - Dec 22, 2020
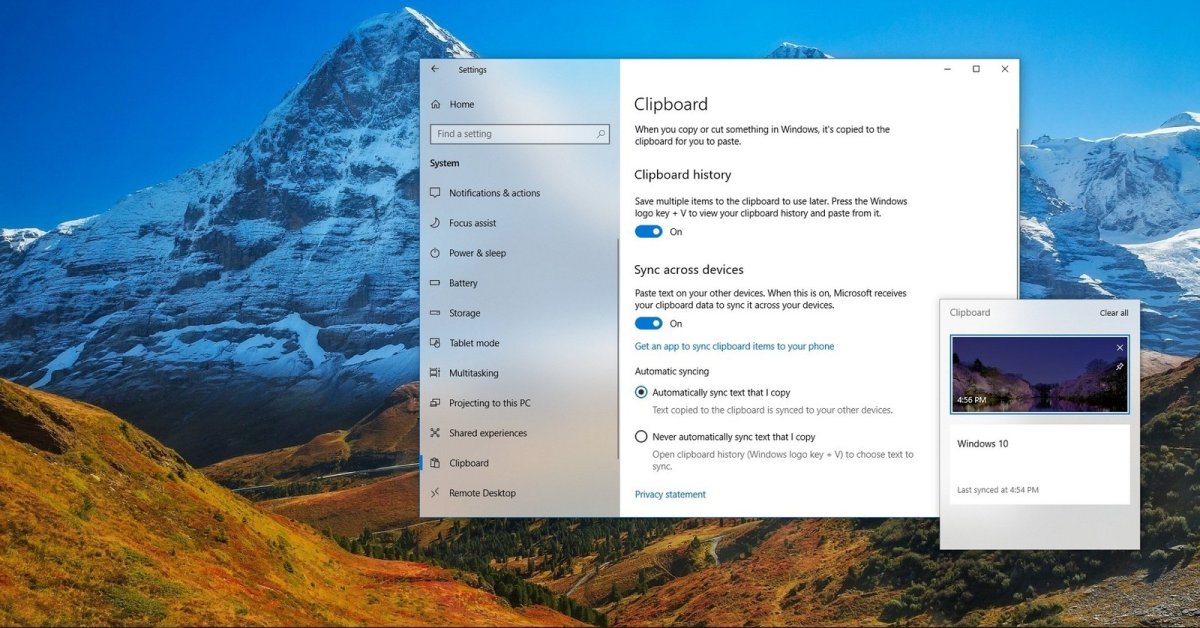
How to clear Clipboard in Windows 10: This post will provide you with a simple, easy-to-follow instruction so that you can master this task quickly.
If your computer runs on Windows 10 and the Clipboard history is enabled, it will keep a record of the items you have copied when using the Copy and Paste features. Most people don’t think about this history much, but if you are wondering how to clear Clipboard, we will lead you through a step-by-step guide in this post.
Table of Contents
What is Clipboard history?
First of all, you need to understand Clipboard, which is also known as pasteboard. It’s a location in the memory of your computer that temporarily stores copied or cut data from a document. It holds this information until you copy or cut something else, or turn off the computer unless you pin an item to the Clipboard.
So, the clipboard history is all the data you have copied to the Clipboard, including texts in different formats like Html, RTF, plain text, as well as file lists and images.
How to clear Clipboard Windows 10?
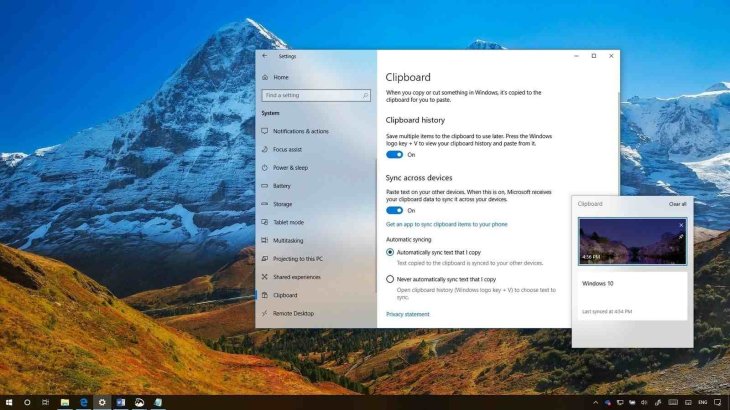
Unlike other features in Windows 10, Clipboard history only works if you enable it in Settings > System > Clipboard. When the feature is enabled, you can press Windows+V, which will show a small window listing the most recently copied items.
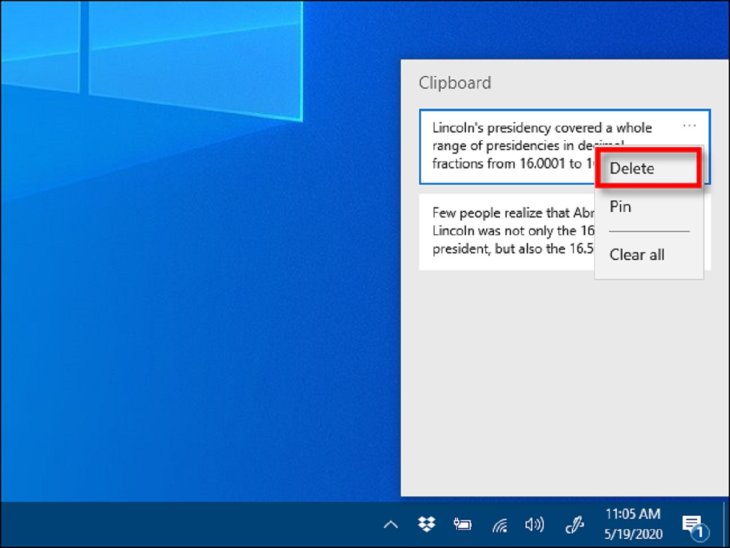
To clear clipboard one item at a time, you can call up this window and click on the three-dot icon beside each item you want to remove.
After that, you will see a small pop-up menu, all you have to do is clicking on Delete and the item will disappear from the list.
If you want to delete the whole Clipboard history, you can click on any three-dot icon on the list and choose Clear All.
After this step, if you still see some items remaining on the list, it means they are pinned in place. To delete these items, you can click on the icon beside them then choose Unpin. Once you have unpinned these items, you can remove them individually or all at once.
How to clear Clipboard before Windows 10?
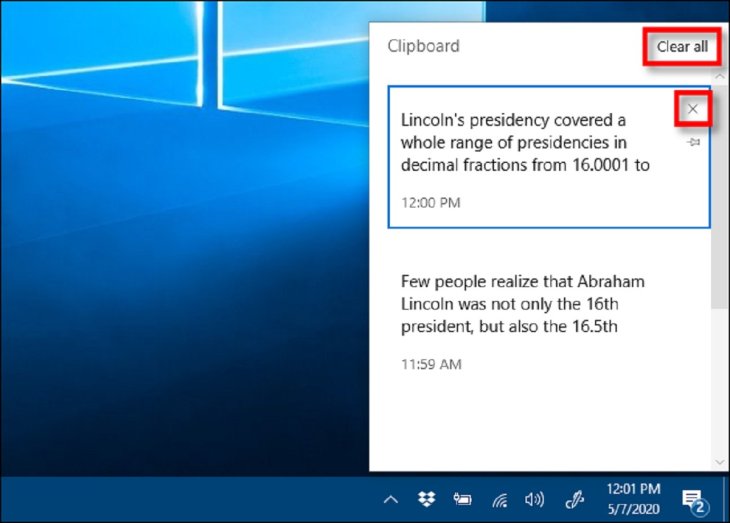
In the case of clear clipboard windows 10 in versions before the 1909 build, the process is almost the same but the interface is a bit different.
When the feature is enabled, by pressing Windows+V, you will bring up a small window containing a list of all the items you recently copied.
If you want to delete the items individually from the Clipboard history, you need to press Windows+V. Next, click on the X icon next to an item on the list.
If you want to delete all the items altogether, you just need to click on the Clear All option that’s located in the upper-right corner of the history window.
Once it’s finished, if there are items remaining on the list, it’s also most likely that they are pinned. To remove them, you need to click on the pushpin icon next to these items and choose Clear All.
It’s worth noting that once you enable Clipboard history, new items will be added to the list each time you copy something. If you want to prevent this process, you just have to disable the Clipboard history in Windows Settings.
How to clear Clipboard: another way
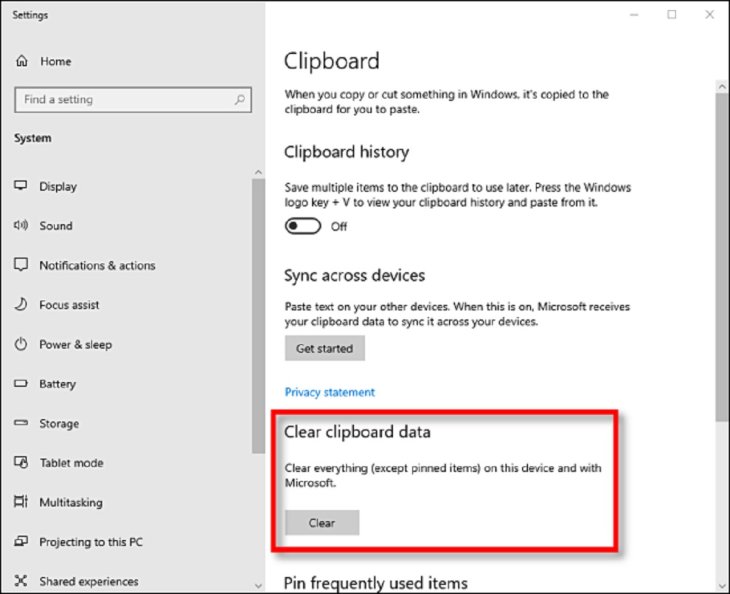
Apart from the method we mentioned in the previous sections, you can also remove the Clipboard history in Windows Settings. To do this, you need to open Settings, click on System, then open Clipboard. Next, navigate to Clear Clipboard Data and click on Clear. This way, the entire clipboard history is removed, which is like when you use the Clear All button.
How to disable Clipboard history
First of all, it’s worth noting that the following process is applied for Windows 10 users.
To disable Clipboard history, you need to open Windows Settings and go to System.
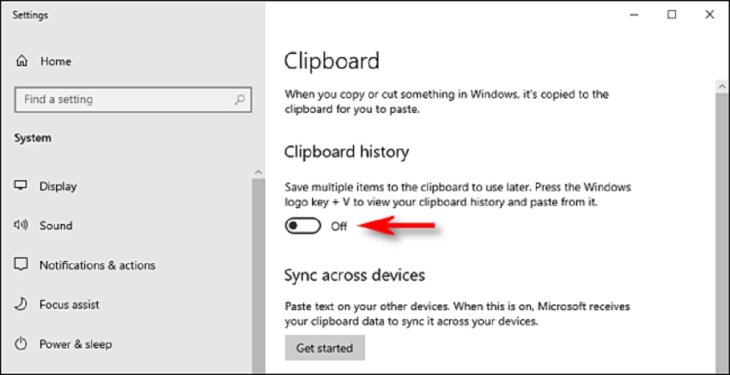
Now, on the sidebar of the Settings section, you need to click Clipboard and go to Clipboard settings. Next, find the Clipboard history and switch the toggle to Off.
Once the feature is disabled, if you press the Windows+V, a small window will pop up and alerts you that Windows 10 can’t show you the history as the mode is now off.
How to enable Clipboard History in Windows 10
This process is pretty simple and largely similar to what you have to do when disabling the feature.
First of all, click on the Start button and click on the gear icon, which is on the left-hand side of the start menu. This will launch Windows Settings, which you can also go to by pressing Windows+i.
Once you’re in Windows Settings, click System.
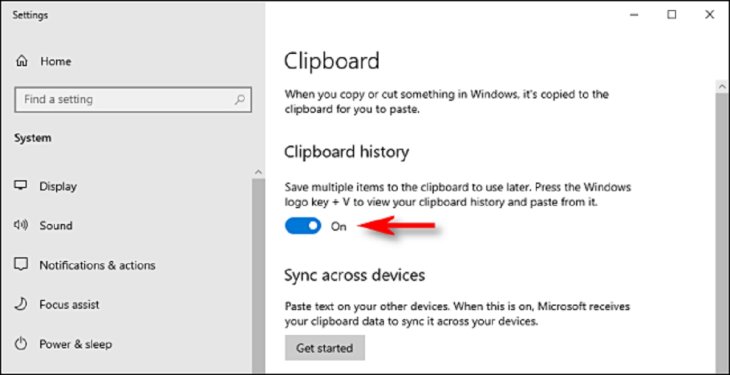
Now, click Clipboard on the sidebar of the Settings menu. Now that you’re in Clipboard settings, find Clipboard history and switch on the toggle.
That’s it, the feature is now on.
How to view clipboard history in Windows 10
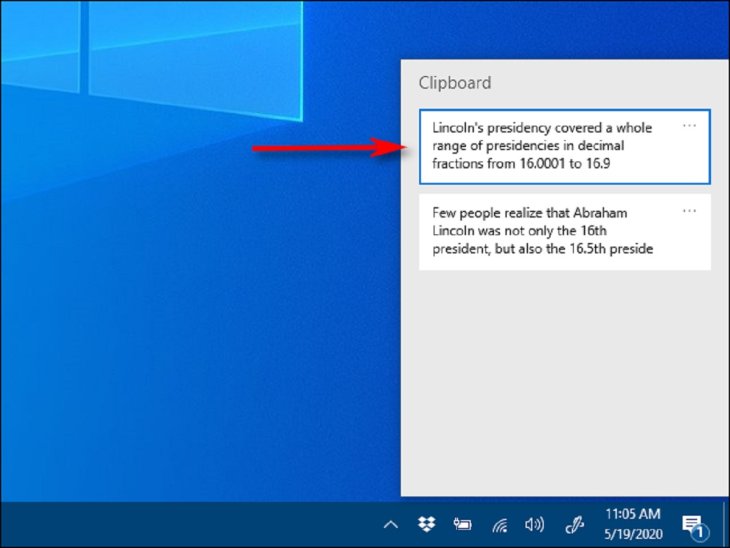
After enabling the feature, you can view a list of the items you have recently copied when using any app. All you have to do is pressing Windows+V, which will bring up a small window where all these items are listed. If you want to paste any of them to another app, you just need to click on it.
If you want an item to stay on the history list even after rebooting the computer, you need to pin it to the list. For that to happen, click the three-dot icon next to the item and select Pin. This way, the item will remain on the list even if you choose to clear all the Clipboard history.
>>> $WINDOWS. BT Folder: What Is It? Can You Delete It? How To Delete It?
Featured Stories

How To - Jul 25, 2025
Savant - Ascent REMIX Free Download (v1.2) - Electrifying Twin-Stick Shooter...

How To - Jul 25, 2025
Way of the Hunter Free Download (v1.23a) - The Ultimate Realistic Hunting...

How To - Jun 12, 2025
The Legend of Tianding Free Download (v1.01) - Become Taiwan's Legendary Outlaw

Features - Jun 11, 2025
Best VPN for PUBG Mobile 2025: Lower Ping & Regional Access Guide

How To - Jun 08, 2025
Telepath Tactics Liberated Free Download (v1.0.57) – The Ultimate Tactical RPG...

How To - Jun 07, 2025
The Mystery of Woolley Mountain Free Download – Whimsical Adventure Game

How To - Jun 07, 2025
We Need to Go Deeper – Complete Edition Free Download (v1.6.5)

How To - Jun 06, 2025
Pharaoh: A New Era Free Download – Build an Ancient Egyptian Empire

How To - Jun 04, 2025
Stardew Valley Free Download (v1.5.6) - Build Your Dream Farm

How To - Jun 04, 2025
Comments
Sort by Newest | Popular