How To Lock A Folder In Windows 10 If You Want To Protect Your Files
Harin - Feb 07, 2020

How to lock a folder in Windows 10 if you have files that you don’t want other people to access? We will give you three simple ways.
- Windows 11 is Now the Most Popular Desktop OS in the World
- What Is Runtime Broker And What Does It Do? Simple Explanation
- Don't Input This Link In Your Browser Or Your PC Will Crash Immediately
If in your computer there are files that you don’t want other people to access, the simplest way is to lock them up in a password-protected folder. Windows supports basic password protection, allowing you to keep your files safe. If you want to protect your precious files, here is how to lock a folder in Windows 10.
But before we begin with the steps, we should warn you that while the method is straightforward and effective, it is not suitable for mission-critical or large-scale use. If you have really sensitive information stored in your device, you should definitely invest in encryption software instead. So let’s begin with steps of how to lock a folder.
Method 1: How to lock a folder in windows 10 with a password using a built-in feature
Here is how to lock a folder in Windows 10 with a built-in feature.
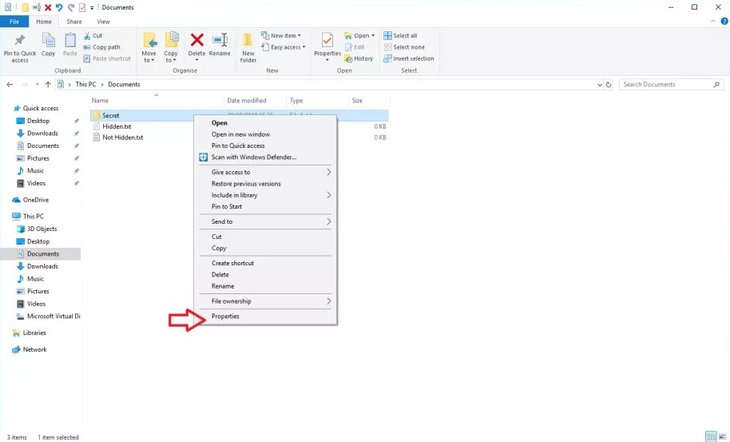
- Step 1: Open File Explorer and go to the file or folder that you want to protect. Right-click to open the context menu. Then click on “Properties.”
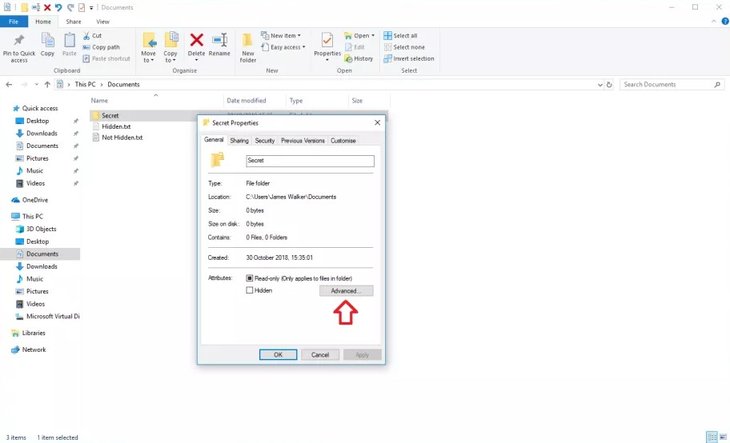
- Step 2: In the Attributes section, click on “Advanced…”
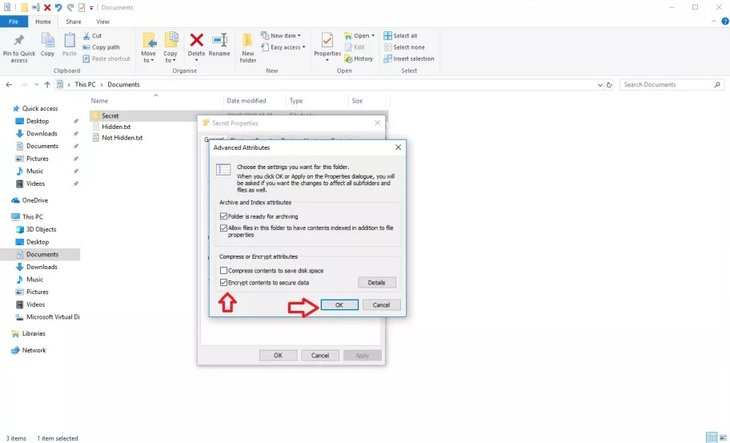
- Step 3: At the bottom, you will find a checkbox for “Encrypt contents to secure data.” Tick that and click OK to go back to the Properties window.
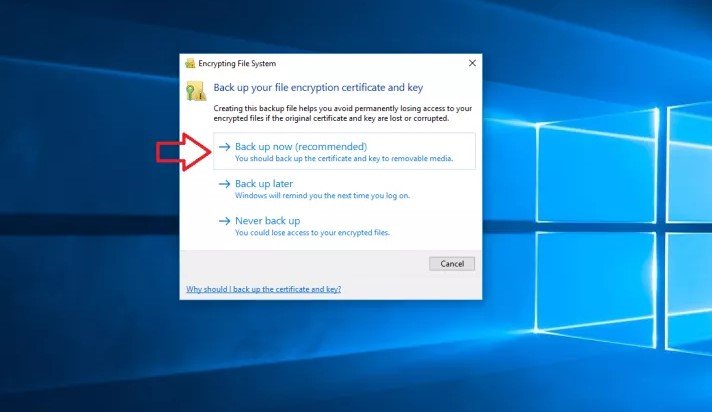
- Step 4: Once you have done, you will be required to back-up the encryption key. This is if you have never used this feature before. All you have to do is click on the toast notification and then follow the prompts to back up your encryption key. It will come in handy in case you lose access to your protected files.
Method 2: How to lock a folder in Windows 10 using a locker folder
You can only use this method if you want to lock files as it won’t work on folders.
- Step 1: Go to the folder where you keep the files that you want to lock.
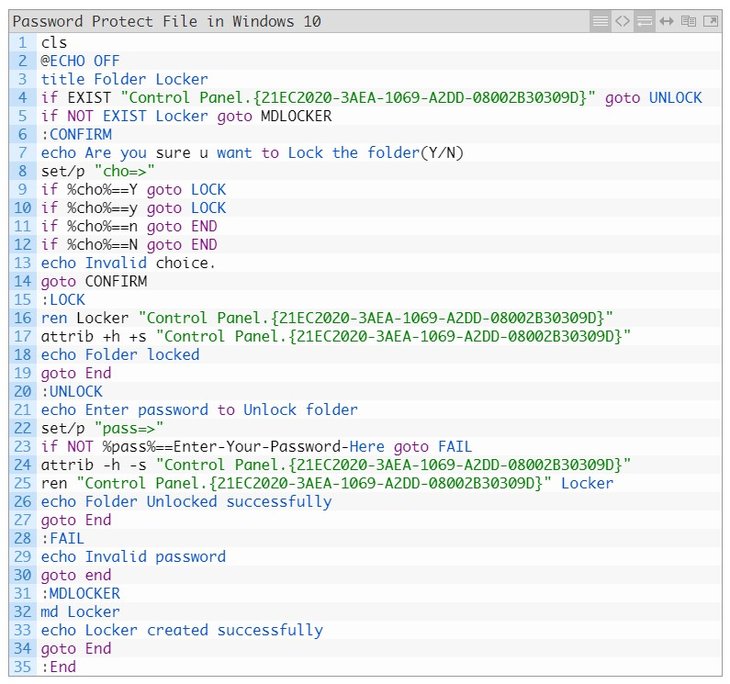
- Step 2: Type the code that we have below in a Notepad document. Then save the text file. You can name it, for example, “PasswordPro.txt”
- Step 3: Move the text file to the folder with the files you want to protect.
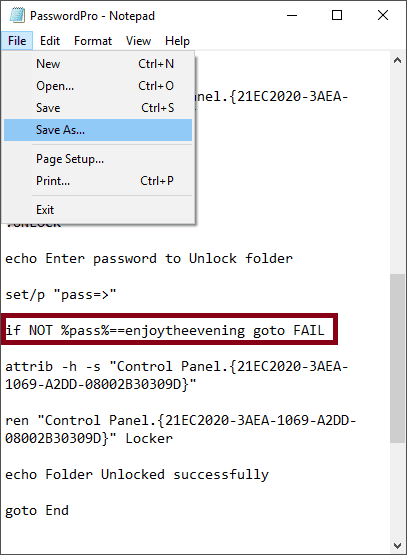
- Step 4: Open the text file. Go to the line with the “Enter-Your-Password-Here” text. Type in your own password. Here we use “enjoytheevening” as the password.
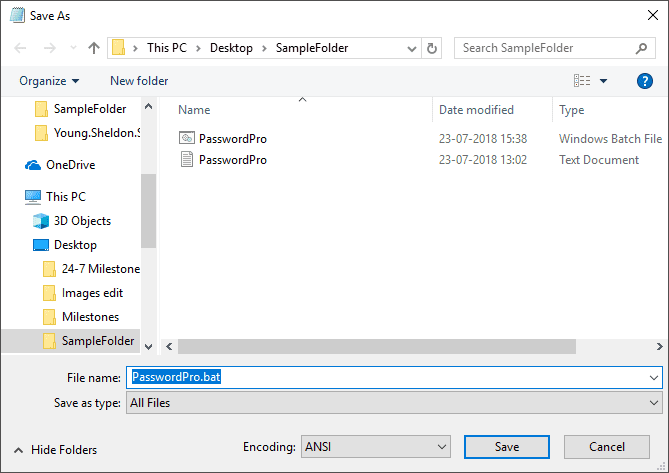
- Step 5: From the top menu, click on File. Choose “Save As” as “All Files”. Then select “Save as type.”
- Step 6: Save your file as “.bat” extension. Then click "Save".
- Step 7: Create a new folder inside the original folder. Then move your files into this new folder.
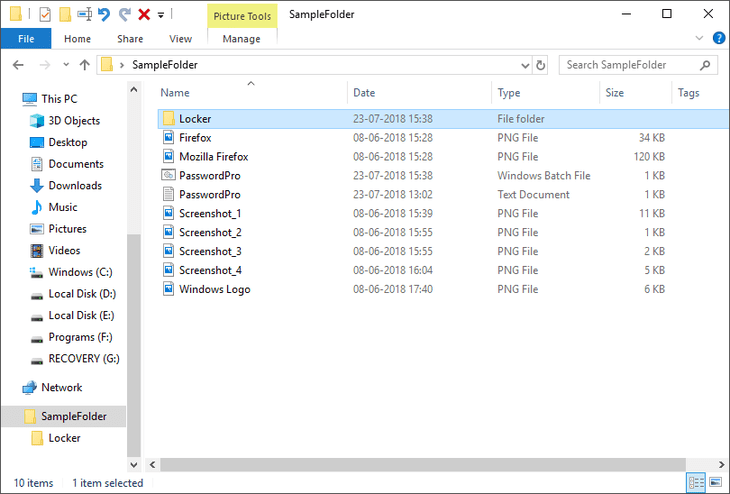
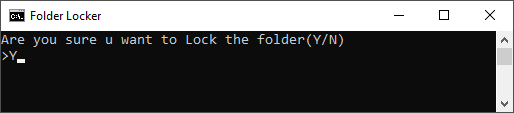
- Step 8: Double click on the “PassWordPre.bat” file. After that, you will be asked to use a command prompt window to lock the locker folder.
- Step 9: Type Y, then press “Enter.” After that, the window will close. At the same time, it will hide the locker folder. Now, the only files left are the “PasswordPro.bat.” and the “PasswordPro.txt.” file. If you want to unlock the folder, just double-click on the file “PasswordPro.bat”. A new CMD window will pop up and you be asked to unlock the folder with your password that you have just created. Press “Enter” and the lock folder will show up.
You can watch the video below for a clear demonstration. How to lock a folder in Windows 10 YouTube demonstration.
Method 3: How to lock a folder in Windows 10 using a third-party app
Here is how to lock a folder in Windows 10 with WinRAR.
- Step 1: Download WinRAR to your computer and install it.
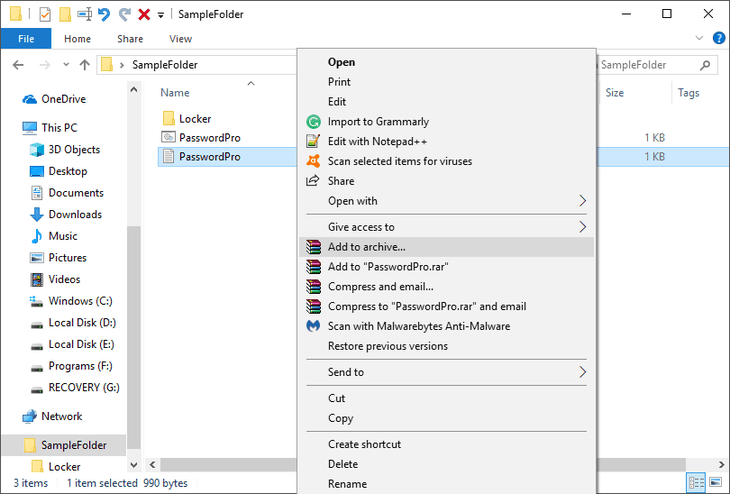
- Step 2: Go to your file or folder and right-click.
- Step 3: Select the option for “Add to archive”.
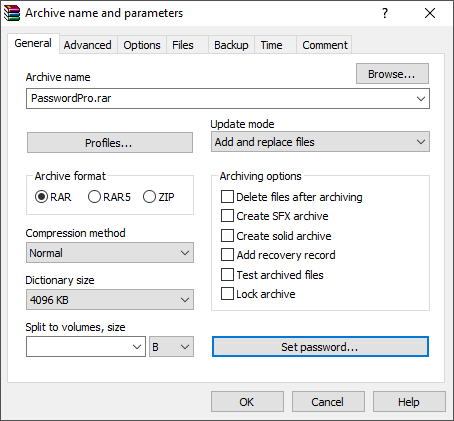
- Step 4: You will need to type in a “Name” for the file and click on the “Set password…” button.
- Step 5: Enter your desired password. Make sure to tick the “Encrypt file names” option.
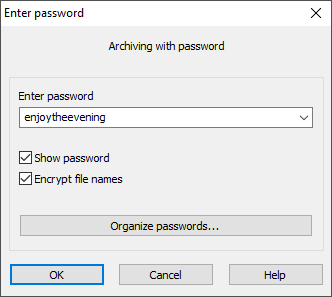
- Step 6: Click OK two times and you are all set.
Those are all three methods on how to lock a folder in Windows 10. We hope that you will find this article helpful.
>>> 'Internet Explorer Cannot Display The Webpage' - How To Fix It
Featured Stories

How To - Mar 04, 2026
Getting Started with AI: A Newbie's Simple Guide

Features - Jun 11, 2025
Best VPN for PUBG Mobile 2025: Lower Ping & Regional Access Guide

How To - Jun 04, 2025
What is a VPN? Your Complete Guide to Safe Virtual Private Networks

How To - May 29, 2025
Receive Buffers And Other Tips To Improve Your Internet Connection

How To - May 21, 2025
How to unlock a disabled iPhone: a step-by-step guide

How To - Mar 31, 2025
Elevate Your Online Presence: Partnering with a Small Business Digital Marketing...

How To - Aug 03, 2023
What is the Yo-Yo test in Indian Cricket?

How To - Jul 10, 2023
Top 7 Stats Sites Every Cricket Fan Must Know

How To - Apr 27, 2023
How much does it cost to start an online casino in 2023

Review - Oct 17, 2022
Comments
Sort by Newest | Popular