How To Make Your Own Ringtone For iPhone
Aadhya Khatri - Oct 15, 2019

Why do you have to put up with an iPhone ringtone that everyone else is using while you can create your own? Here is how.
- After 6 Months Of Waiting, Big Sur Is Finally Here, Available Starting November 12
- First Apple Silicon Mac Devices Leaked In macOS's Codes
- How To Download iOS 14 Beta, iPadOS 14 Beta, And macOS Big Sur Beta
Why do you have to put up with an iPhone ringtone that everyone else is using while you can create your own? iPhone users have everything they need at their disposal to do so, and the handiest tool for the job is nothing else but iTunes.
While the process may seem complicated, it is actually very easy and quick, as long as you follow our guide below:
Open And Update iTunes
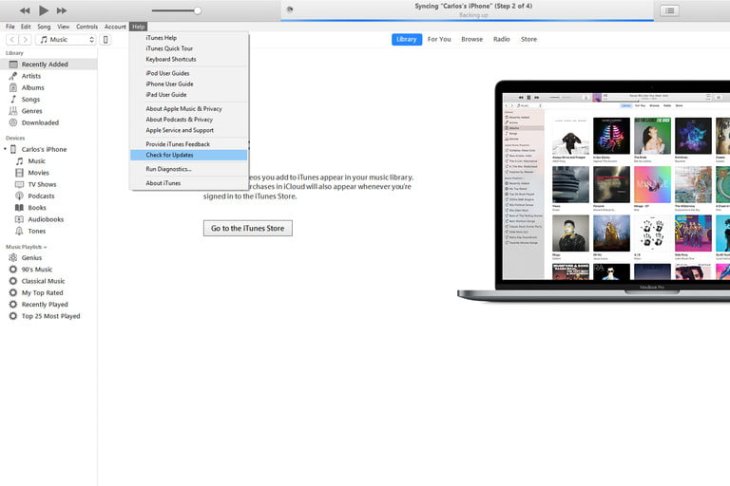
The first step is to open iTunes on macOS or Windows and make sure that the app has been updated. To check for this information, select iTunes on the application toolbar if you are using macOS and choose Check for Updates from the drop-down menu. For users of macOS Catalina, go to Apple Music app to access your music library.
For users of Windows 10, look for the Help option on the menu bar, you can find it right below the palyback options. Select Check for Updates from the drop-down menu.
Choose A Song
Pick a song you want to use as the ringtone for your iPhone. Think hard about what you want to hear as the ringtone will run in a loop of 30 seconds, so do not select anything you will regret later on. Now is the time to mark the start and stop time of the loop you want to use for the ringtone.
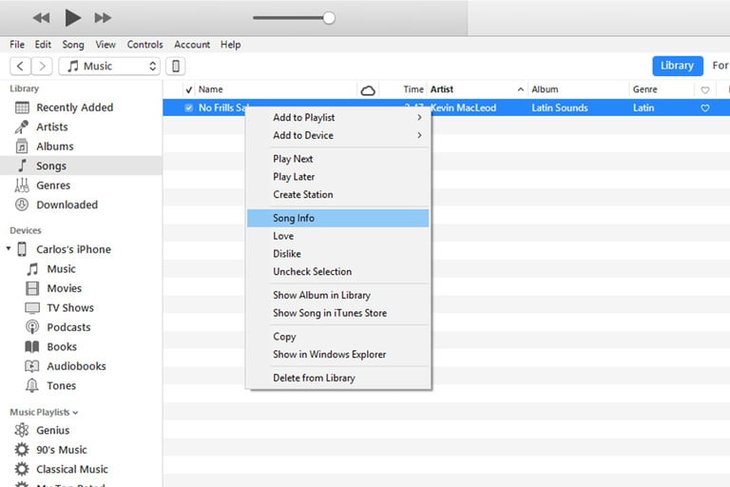
Add The Start And Stop Times
To make a loop, use the crop function of iTunes to pick out the part you want. Either right-click or press the combination Ctrl-click on the song and you will see a drop-down list, pick Song Info.
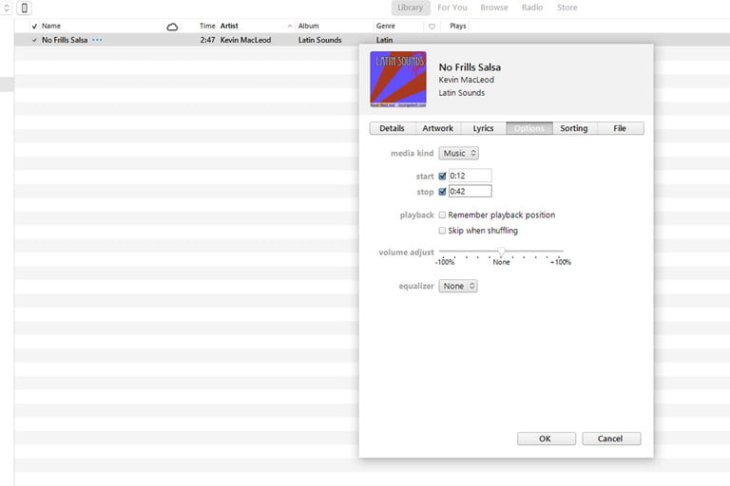
Select the Options tab on the top part of the window. Now you should see fields for the start and stop. Type in the time and remember to keep the length below or at that exact time frame. In this example, our starting point is 0:12 and the stop time is 0:42. When you have done, select OK.
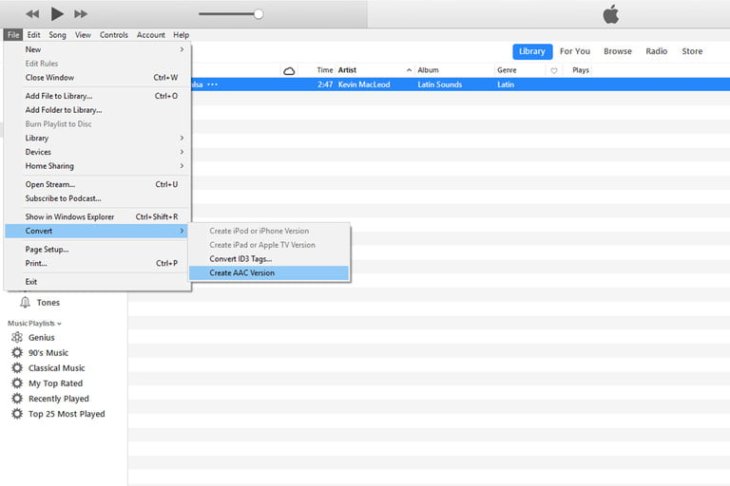
Create An AAC Version
The preferred audio format of Apple is AAC as it offers the same quality of sound but with less storage than MP3. The latest version of iTunes gives you the option to convert any song to this format, which can come in handy when you want to create a ringtone and save some storage space.
With the cut-out version of the song, follow File > Convert > Convert to AAC Version. Since we have created another start and stop points, this process will create another version of the shorter song in the new format.
You can find the version right below the original song in the iTunes library.
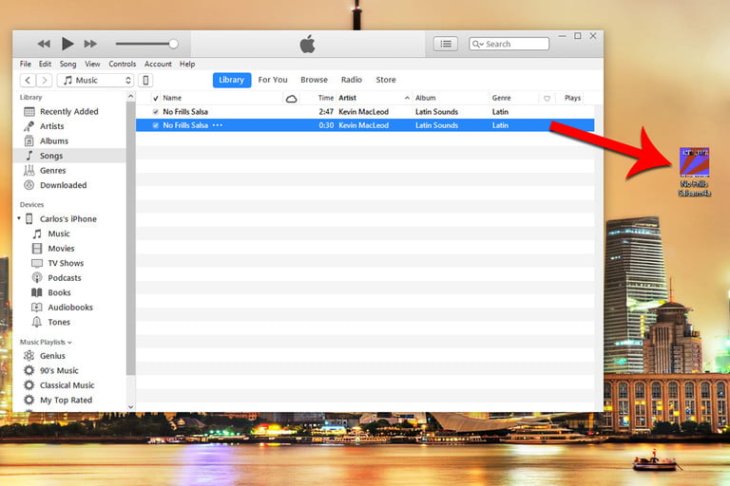
Copy The File And Delete The Old One
When the AAC version of the cut-out song has been created, drag it to the location you want to save it in or desktop. Doing so will make a copy of the song in the desired location.
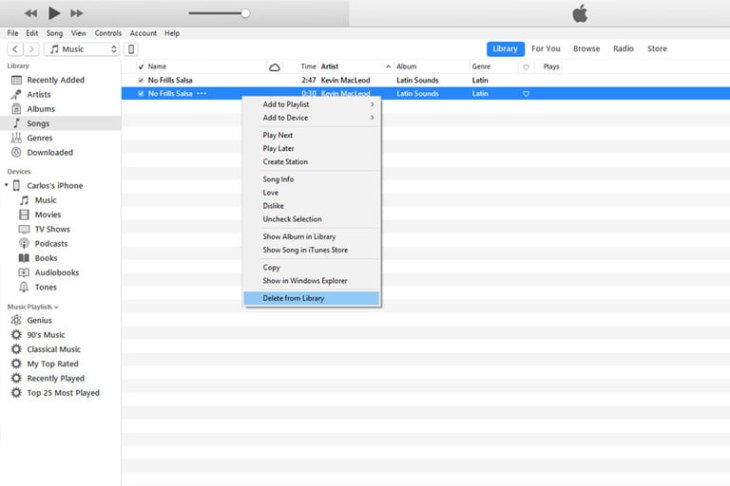
So now when you have had the AAC song, the shortened one is no longer needed. If you want to save that snippet for some other purposes, feel free to leave it there; otherwise, it is advisable to delete it to clear up some space.
To do so, either right-click or use the combination of Ctrl-click on the version in iTunes and pick Delete from Library. If you see the Delete File button, select it.
Change The Extension
If you click on the file, you will notice that AAC format usually has the “.m4a,” extension. However, iTunes will have the “.m4r,” which is the same thing but under a different name.
The next step is to change the extension to “.m4r” in order to use the song as a ringtone. On desktop or the location you have saved the file earlier, right-click on the file and change the name. You will see a window asking you to confirm the action, choose Use .m4r or Yes.

Check again to make sure that you have not accidentally used symbols like the underscore or hyphen because this will prevent the file from working.
Some users of Windows will not be able to change the extension in this way as the system does not show it. Here is how to solve this problem:
From Start menu, open Control Panel, or search for it in Windows 10. Choose Appearance and Personalization. Select File Explorer Options.
Pick the View tab and remove the check for the Hide extensions option. After that, select Apply at the bottom of the window. Now users can see the extension and change it.
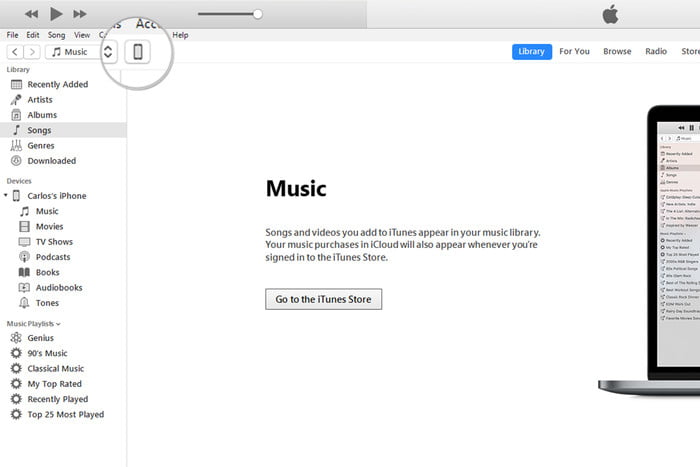
Add File To Your iPhone
Now is the time to transfer the file to your iPhone. Connect the iPhone and the computer with a lighting-to-USB cable. At the upper left corner, you will see an icon for the iPhone. Locate the Summary section and find Options. Tick the box for Manually manage music and videos. Next, click on the Apply button.
Under On My Device you will see the Tones tab, move the .m4r file there. Now the ringtone is automatically synced with the iPhone.
Sometimes you cannot drag the file to the Tones tab. If this is the case, disconnect the device and restart iTunes, and then reconnect and move the file as instructed above.
Set Your Ringtone
Follow Settings > Sounds & Haptics > Ringtone. From the list of results, select the ringtone you want from the top. Users have the choice to set the ringtone for Facebook posts, tweets, voicemail, text, and email tone.
When you have had the desired song on your iPhone, you can use it as a notification sound for almost anything.
Featured Stories

How To - Mar 04, 2026
Getting Started with AI: A Newbie's Simple Guide

Features - Jun 11, 2025
Best VPN for PUBG Mobile 2025: Lower Ping & Regional Access Guide

How To - Jun 04, 2025
What is a VPN? Your Complete Guide to Safe Virtual Private Networks

How To - May 29, 2025
Receive Buffers And Other Tips To Improve Your Internet Connection

How To - May 21, 2025
How to unlock a disabled iPhone: a step-by-step guide

How To - Mar 31, 2025
Elevate Your Online Presence: Partnering with a Small Business Digital Marketing...

How To - Aug 03, 2023
What is the Yo-Yo test in Indian Cricket?

How To - Jul 10, 2023
Top 7 Stats Sites Every Cricket Fan Must Know

How To - Apr 27, 2023
How much does it cost to start an online casino in 2023

Review - Oct 17, 2022
Betting on Sports Events in the Fairplay App
Read more

ICT News- Jul 29, 2026
The RAM Crisis: Graphics cards shoot up in prices again
Until memory production capacity catches up, graphics cards are likely to remain more expensive than many enthusiasts hoped.
Comments
Sort by Newest | Popular