7 Tips And Tricks To Make The Most Of A Multi-Monitor Setup
Dhir Acharya - Jul 22, 2019
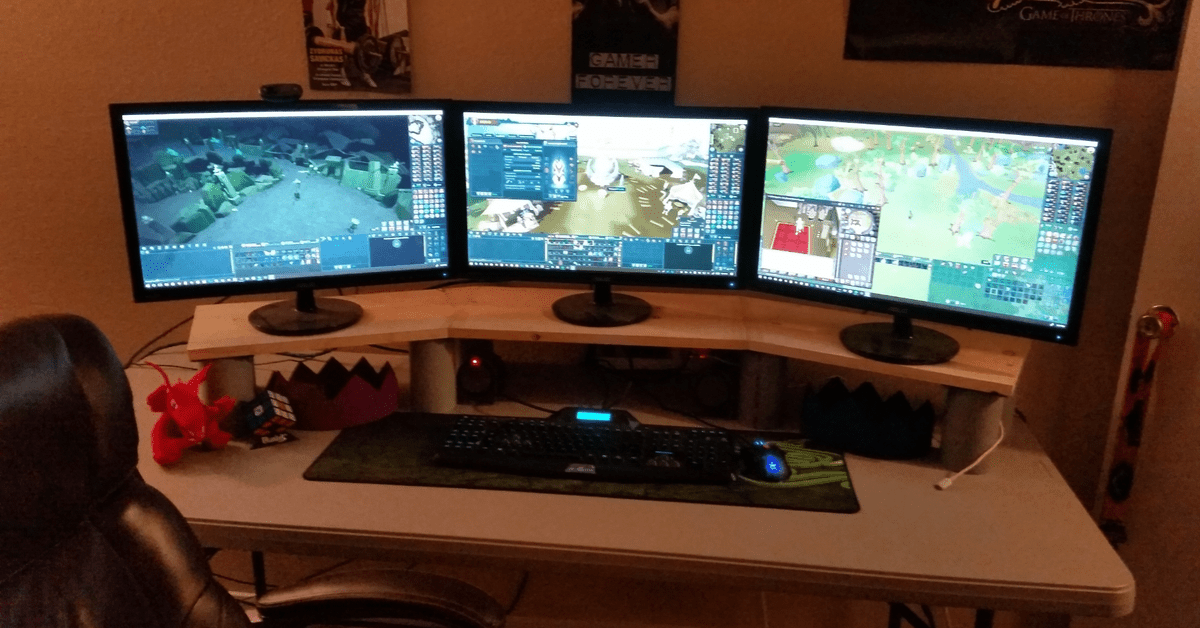
Using two screens on one computer can boost your productivity as well as the overall user experience. These tips and tricks will push that even further.
- Don’t Know How to Install iTunes For Chromebook? Here’s How
- A Simple And Straightforward Guide On How To Delete Twitch Account
- Why Spotify Randomly Pauses And How You Can Fix It
Using two screens on one computer can boost your productivity as well as the overall user experience. And if you already have such setup, these seven tips and tricks can help you make the most of it.

1. Change the primary screen
Much of the main action takes place on the main (or primary) display, including the taskbar or menu bar, dialog boxes and app windows appearing by default, the login screen showing up, etc.
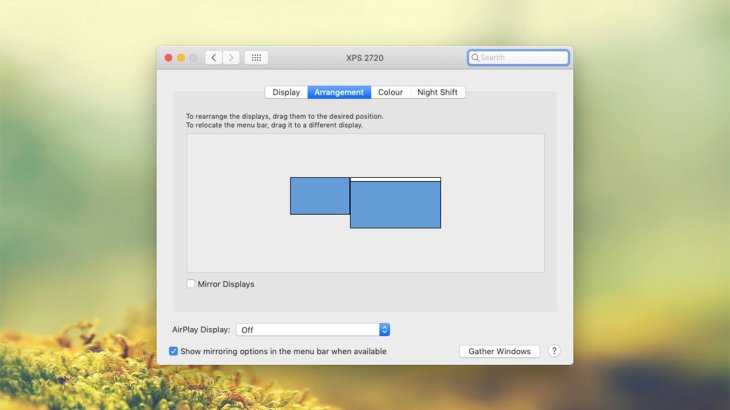
And you can set which display to be the main one. If you’re using Windows, go to System > Display. Here, choose the one display to make primary and tick ‘Make this my main display.’ If you’re using macOS, go to the Apple menu, then launch System Preferences > Display > Arrangement. Next, drag the white menu bar from the display you’re on to the one you want to make primary.
2. Manage windows
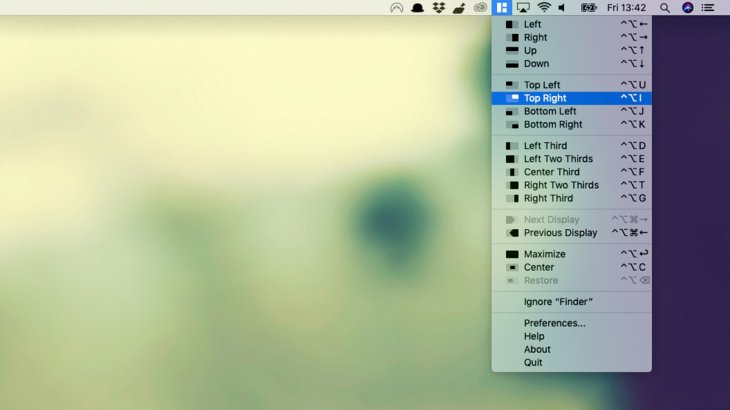
Doing this across displays can be tricky, but you can turn to a number of third-party tools to make it easier. For macOS users, it will cost Rs 69 to use Magnet, which will help snap windows to the corners and sides of the screen, regardless of how many screens you use.
For Windows users, DisplayFusion is a great choice which offers finer control over managing windows across multiple displays. For instance, you are able to snap apps to the screen’s edge or open a specific app on a specific display if you want to. DisplayFusion has more to offer, such as the ability to stretch the taskbar from one screen to another and set each screen with different wallpaper. Its basic version is free but with Rs 2,068, you can enjoy every feature available.
3. Stretch a wallpaper across monitors
Both macOS and Windows users can apply different backdrops on different displays. On macOS, just go to System Preferences > Desktop & Screen Saver then choose a backdrop. On Windows, go to Settings > Personalize > Background and right-click on the picture you want to set as the second display wallpaper.
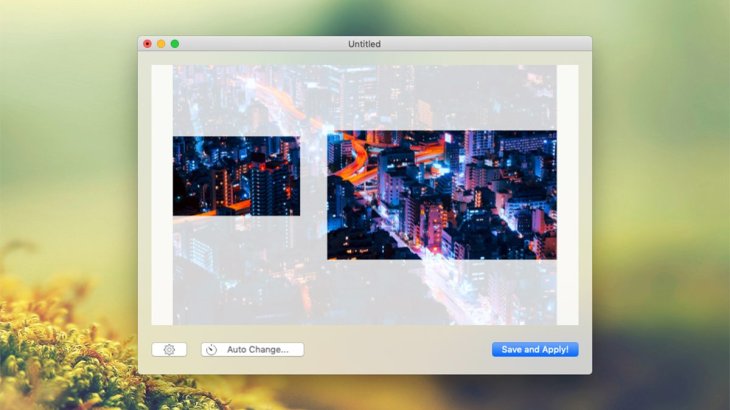
If you want a wallpaper stretching across multi-monitors, you can use Multi Monitor Wallpapers on macOS. Just supply an image and the app will split it to perfectly match the position and size of your displays. The app is priced at Rs 689 but the trial version is free.
For Windows, DisplayFusion can help with this too. You can pick images to expand across multiple screens. It also acts as a native feature but not as well, on the Background screen, you click on Choose a fit then select Span.
4. Use multiple desktops and spaces
You can do this on both Windows and macOS. Essentially, “Spaces” or “Desktops” allow you to set up virtual desktops working like additional monitors generated inside the software that you are able to switch between when and as you need. You can use these to replace or along with an external display.
To do this, Windows users search Task view in the search box, select New desktop and make a new one. The new desktops work independently so you could end up with three screens on your left monitor along with two on your right monitor.
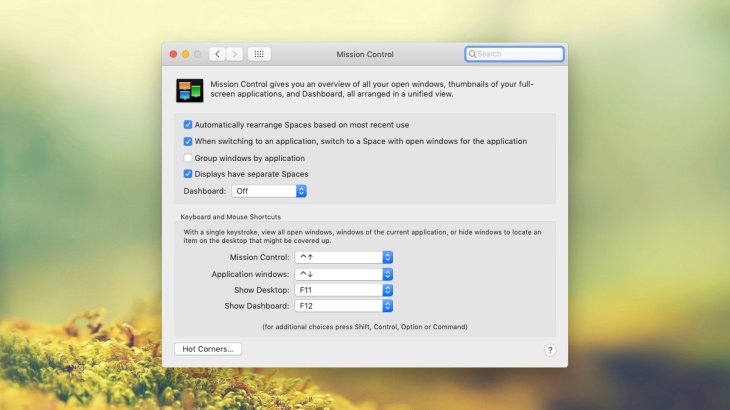
macOS users, on the other hand, go to the Apple menu > System Preferences > Mission Control, then tick Displays have separate Spaces. This means you will go full screen on one display without turning off the other one. Then, you can create new Spaces by opening Mission Control and clicking on the ‘+’ icon in the corner at your top right.
5. Switch resolution settings
Usually, the two screens you have feature different resolutions and sizes. And though macOS and Windows automatically manage this disparity, you can still use some tweaks to improve the experience.
For Windows, go to Start menu and click on the cog icon to launch Settings, then go to System > Display. Now, at the top, select the screen you want to change the settings for, then underneath, use options for Orientation and Resolution. You can also change the scaling of apps, text, as well as other elements on some displays.
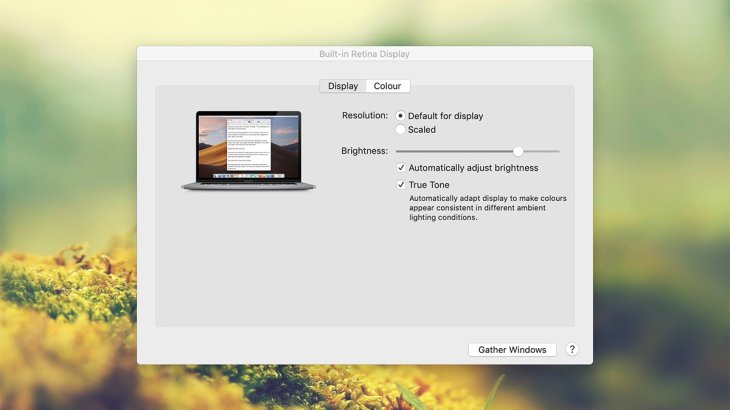
For macOS, go to the Apple menu > System Preferences > Displays, here you can change the resolution after clicking Scaled, the rotation and maybe refresh the rate of the displays you are working with.
6. Wirelessly connect second screens
Beyond usual expectations, you can add an extra display like a monitor or even a TV. For instance, if you have a Chromecast plugged into something with an HDMI input, you can connect to your Windows or Mac desktop using Google Chrome. To do this, users go to the Chrome menu > Cast then select the Chrome cast device. Next, click on Sources to choose between casting the entire desktop or a browser tab.
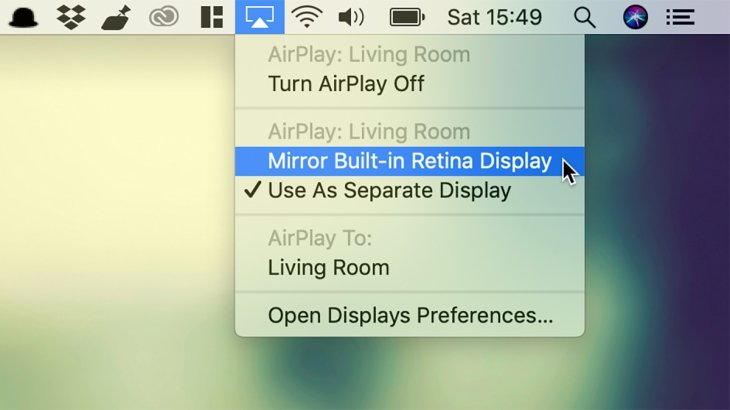
If you use macOS and have an Apple TV, you can use AirPlay to extend or mirror your desktop. From the menu bar, click on AirPlay, select the Apple TV and decide to either mirror your Mac’s display or use it as an extension for your desktop.
You can also consider using AirParrot, which works on both macOS and Windows, with the ability to beam to several devices such as macOS and Windows computers, Apple TVs, Chromcasts.
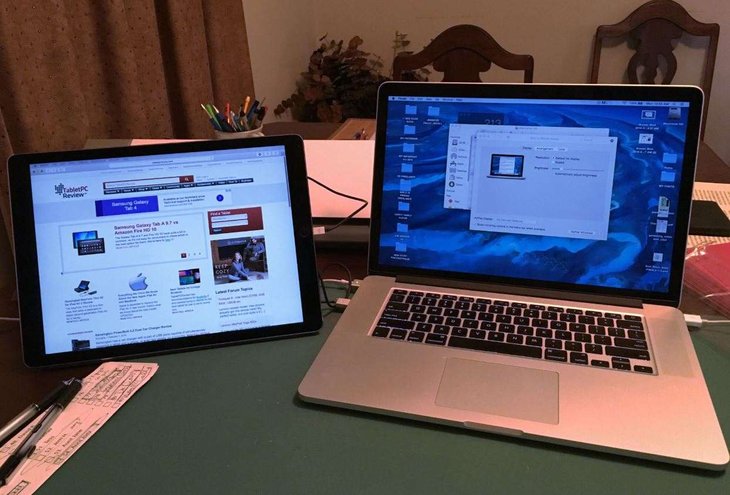
7. Use the iPad as a secondary screen
Later this year, macOS Catalina will bring the Sidecar feature that lets you set up an iPad as your Mac’s secondary display without having to use wires. But there are still other options, for Windows too.
Air Display is probably the best. The app works with Android and Apple tablets and is able to function in wireless or wired (USB) mode. You can also turn to Luna Display, but both Air Display and Luna Display work on the Mac only.
In case you want to connect an iPad to a Windows device as a second screen, try Duet. It doesn’t come with a wireless mode, which means you need a direct connection to your PC. But it guarantees a stable link.
Featured Stories

How To - Mar 04, 2026
Getting Started with AI: A Newbie's Simple Guide

Features - Jun 11, 2025
Best VPN for PUBG Mobile 2025: Lower Ping & Regional Access Guide

How To - Jun 04, 2025
What is a VPN? Your Complete Guide to Safe Virtual Private Networks

How To - May 29, 2025
Receive Buffers And Other Tips To Improve Your Internet Connection

How To - May 21, 2025
How to unlock a disabled iPhone: a step-by-step guide

How To - Mar 31, 2025
Elevate Your Online Presence: Partnering with a Small Business Digital Marketing...

How To - Aug 03, 2023
What is the Yo-Yo test in Indian Cricket?

How To - Jul 10, 2023
Top 7 Stats Sites Every Cricket Fan Must Know

How To - Apr 27, 2023
How much does it cost to start an online casino in 2023

Review - Oct 17, 2022
Comments
Sort by Newest | Popular