Steps To Enable And Use Lenses And Filters In Snapchat
Chitanis - Aug 27, 2019
Snapchat has grown increasingly popular. Here are the detailed instructions for new users to get started with Snapchat filters as well as lenses.
- How To Know If Someone Blocked You On Snapchat?
- Houseparty App Lets You Throw An Online Party Amid CO.VID-19 Lockdown, Safe And Fun
- Snapchat India: How To Create An Account And Change Your Username
Snapchat is one of the top social media apps among millennials. It is best known for its wide variety of fun lenses and filters. However, if you are new to the app, you can be very confused about its various features. For example, new users may find it hard to tell the differences between lenses and filters.

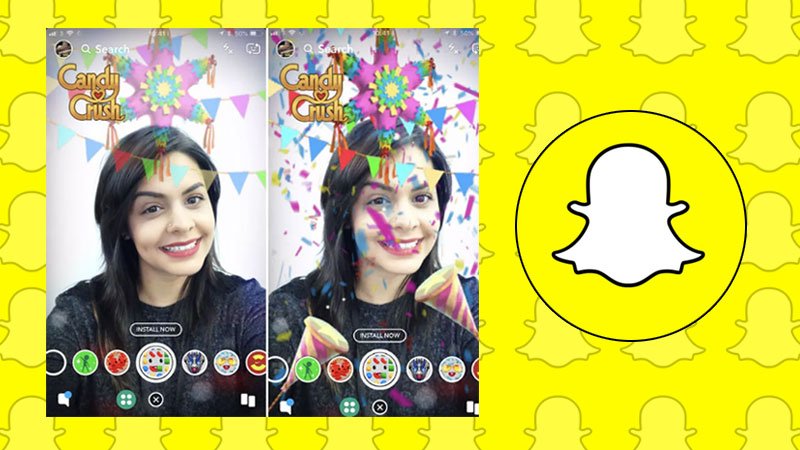
Basically, lenses use augmented reality to customize users’ faces with animated features. These animations can transform your face or add special effects to your voice. Meanwhile, filters are static overlaying on your videos or images.
In this article, we will explain everything you need to know to enable and apply Snapchat filters as well as lenses to your images and videos on both Android and iPhone apps.
Steps to enable Filters on Snapchat
To use Snapchat filters, make sure that Filters are enabled in settings. Here is what you need to do:
- Open Snapchat app on your device.
- Click on your profile picture in the upper left corner.
- Tap the cog icon on the Profile screen, which opens the Settings.
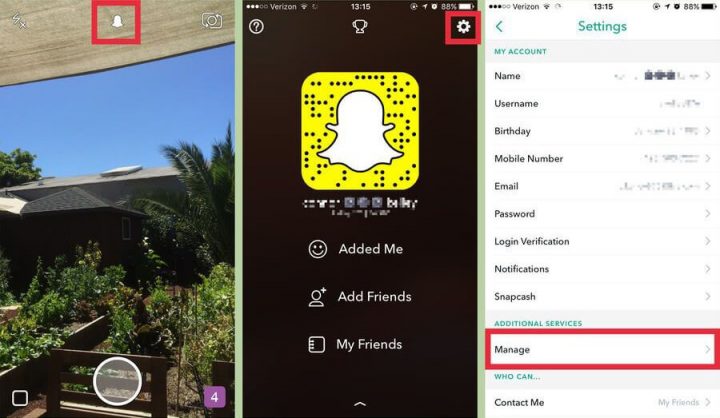
- Scroll to the “Additional Services” section, and tap “Manage”.
- Toggle “Filters” on.
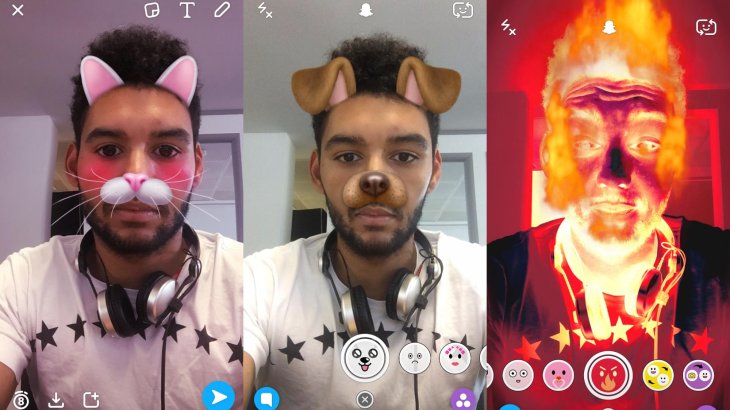
Steps to activate and apply filters to your snap
- Open Snapchat app on your smartphone.
- Press the circular button at the bottom of the screen to capture a photo. If you want to record a video, tap and hold your finger.
- Scroll left or right to see the available filters and select the one you would like to use.
- Tap the white arrow button in the right corner to share your snap to other Snapchat users or post the snap as a Story.

If you want to combine two or more filters, hold your finger down on the screen to anchor the filter you like while swiping right or left with another finger.
Depending on different versions of the app, users can see a button with three stacked squares to lock the current filter. You can find it under other tools in the column that appears to the right side of the main screen.
Steps to apply Snapchat lenses to your snap
- Open Snapchat app on your device.
- Press anywhere on the screen to open the lens carousel which appears to the right side of the camera button.
- Scroll through the lens options.
- Tap on the lens you would like to use. Follow instructions and adjust your position if needed. Then take a snap as normal.
If you already get bored with the preset lenses, access more lenses by opening Lens menu, then tap the smiley faces to the right of the shutter button.
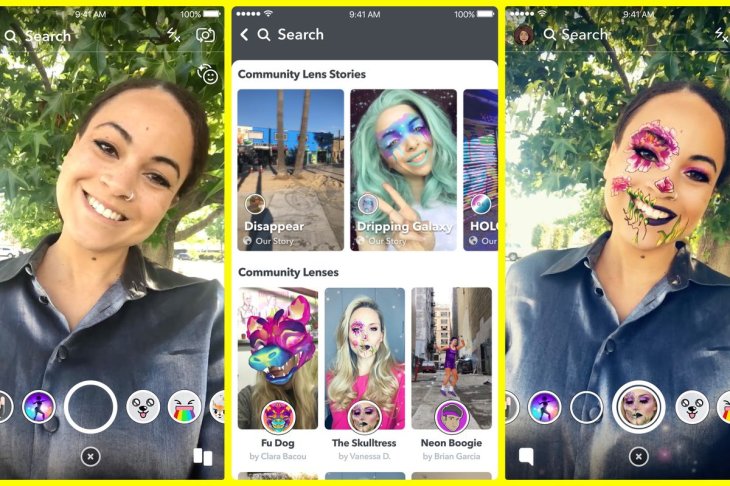
This will take you to the Lens Explorer, where you can browse thousands of community lenses and add to your app.
Featured Stories

How To - Mar 04, 2026
Getting Started with AI: A Newbie's Simple Guide

Features - Jun 11, 2025
Best VPN for PUBG Mobile 2025: Lower Ping & Regional Access Guide

How To - Jun 04, 2025
What is a VPN? Your Complete Guide to Safe Virtual Private Networks

How To - May 29, 2025
Receive Buffers And Other Tips To Improve Your Internet Connection

How To - May 21, 2025
How to unlock a disabled iPhone: a step-by-step guide

How To - Mar 31, 2025
Elevate Your Online Presence: Partnering with a Small Business Digital Marketing...

How To - Aug 03, 2023
What is the Yo-Yo test in Indian Cricket?

How To - Jul 10, 2023
Top 7 Stats Sites Every Cricket Fan Must Know

How To - Apr 27, 2023
How much does it cost to start an online casino in 2023

Review - Oct 17, 2022
Betting on Sports Events in the Fairplay App
Read more

Mobile- Apr 29, 2026
Stop Trying to Make the App-Less Phone Happen: The ChatGPT Phone Is Already DOA
The app-less phone dream keeps resurfacing because it sounds elegantly simple.
Comments
Sort by Newest | Popular