Remove Shortcut Virus In USB Following These Steps To Protect Your Computer
SachinSangwan - Oct 07, 2019
When a USB flash drive infected with a virus makes its way to your computer, it'll be activated thanks to AutoRun, a built-in function in Windows.
- UK Startup Develops The First Antimicrobial Smartphone In The World
- Understanding USB Charging Technology And Preventing Phone Damage
- ICMR Warns That China’s Cat Que Virus Could Spread To India
Basically, a virus can enter from anywhere in your PC, like from the removable storage device. When a USB flash drive infected with a virus makes its way to your computer, it'll be activated thanks to AutoRun, a built-in function in Windows.
Luckily, you can disable this feature. Through this article, you'll learn how to get rid of the shortcut virus through the command prompt as well as to safeguard your PC from attacks in the future.
How does a Shortcut Virus function?
Unluckily, some bad people had abused the AutoRun feature by attaching a virus from USB to autorun.inf so that they will launch simultaneously, meaning as soon as you plug your USB to the computer, you install a virus.
The impact of the virus is dependent on what it's programmed to do. Some viruses add a keylogger to the system, allowing fraudsters to track your keystrokes so they can hack personal info such as banking information and passwords.
How to disable the AutoRun
AutoRun is an amazing feature, but it's best to disable it if you want to avoid attacks from infected autorun.inf files.
Now, follow these steps to disable the AutoRun in your Windows computer:
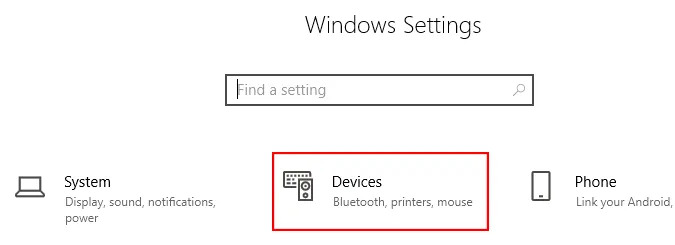
- Visit Settings, or you can use the shortcut key "Windows + I." Then, go to 'Devices' and then 'AutoPlay.'
- Switch off AutoPlay.
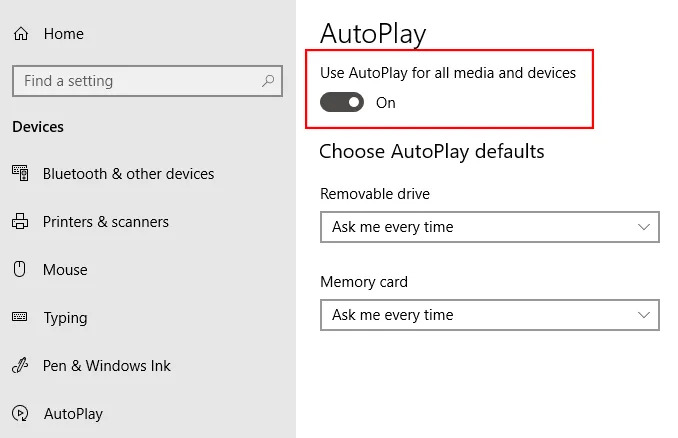
Note that you also have the option to use the drop-down menu for selecting default action when any external device is inserted.
To delete the 'autorun.inf' file
In case you think that your USB drive is affected with a virus, delete autorun.inf file. This will block the virus from getting launched.
Using CMD
Follow the steps below to remove the file by running the command prompt, aka CMD.
Step 1. Launch Run. Type in 'CMD' for opening the Command Prompt.
Step 2. Enter USB drive letter (for instance, "F:" or "G:" without quotation marks). Press 'Enter'.
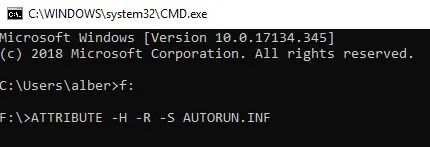
Step 3. Type in command line ATTRIBUTE -H -R -S AUTORUN.INF and press 'Enter.'
Step 4. Type DEL AUTORUN.INF then press Enter.
Using the Windows Explorer
Here's how to delete autorun.inf file by using the Windows Explorer.
Step 1. Launch the Windows Explorer (or press Windows + E).
Step 2. Launch the USB drive, which can be found on the left side pane, then you will see the USB's content.
Step 3. From the list, choose autorun.inf. Press the Delete button.
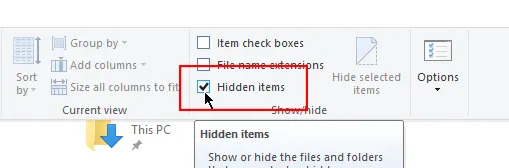
It's worth noting that typically, autorun.inf is a hidden file. Ensure that the "Show Hidden Files" option is enabled. If it is not enabled, then go to 'View' and tick the 'Hidden Items' for enabling it.
The computer should remain safe from the malicious virus by deleting autorun.inf file via either method. However, you're recommended to use antivirus software for scanning the USB flash drive to detect malware immediately after the process as an additional security measure.
Featured Stories

How To - Mar 04, 2026
Getting Started with AI: A Newbie's Simple Guide

Features - Jun 11, 2025
Best VPN for PUBG Mobile 2025: Lower Ping & Regional Access Guide

How To - Jun 04, 2025
What is a VPN? Your Complete Guide to Safe Virtual Private Networks

How To - May 29, 2025
Receive Buffers And Other Tips To Improve Your Internet Connection

How To - May 21, 2025
How to unlock a disabled iPhone: a step-by-step guide

How To - Mar 31, 2025
Elevate Your Online Presence: Partnering with a Small Business Digital Marketing...

How To - Aug 03, 2023
What is the Yo-Yo test in Indian Cricket?

How To - Jul 10, 2023
Top 7 Stats Sites Every Cricket Fan Must Know

How To - Apr 27, 2023
How much does it cost to start an online casino in 2023

Review - Oct 17, 2022
Betting on Sports Events in the Fairplay App
Read more
ICT News- Jul 29, 2026
The RAM Crisis: Graphics cards shoot up in prices again
Until memory production capacity catches up, graphics cards are likely to remain more expensive than many enthusiasts hoped.
Comments
Sort by Newest | Popular