How To Record Your Screen On Windows
Aadhya Khatri - Dec 04, 2019
Whatever your purpose to record your screen, there are different ways you can achieve what you want without paying or downloading anything
- YouTube AI Mistakes Black And White In Chess For Racism
- Young YouTuber Killed When Approaching Strangers With A Knife In A Prank Video
- YouTube Comments Not Loading? Here Is How You Can Fix It
Whatever your purpose of recording your computer screen, there are different ways you can achieve what you want without paying or downloading anything. Here are some methods you can use for screen-recording:
Record Your Screen With PowerPoint
PowerPoint is software for presentation, but in times of need, it can double as a tool to record screens. Here is the guide on how to do that:
Step 1: Launch PowerPoint, choose Insert, and Screen Recording.
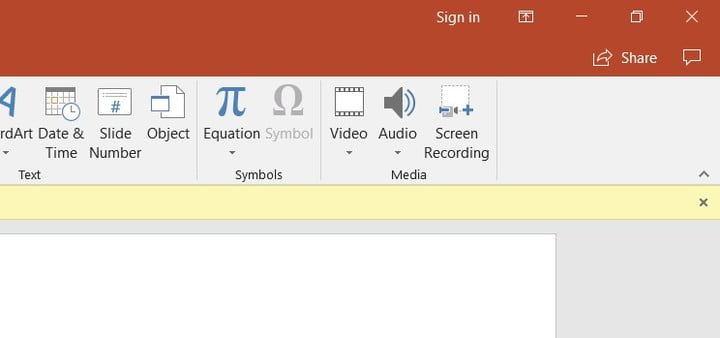
Step 2: To select a specific area of the screen you would like to record, click on Select Area. To record the whole screen, use the combination of Windows Key + Shift + F.
Step 3: Either press Windows key + Shift + R or click the Record button to start recording.
Now you can either save the video separately or embed it. While quick and easy to use, PowerPoint screen recording’s editing options are quite limited. What you can do is to add borders, glow, shade, as well as to change its shape.
Record Your Screen With YouTube Live Streaming
YouTube Live Streaming is another quick way to record your screen.

Step 1: On Google Chrome, sign in to your account on YouTube. Next, choose the icon for your account and access YouTube Studio.
Step 2: Locate “Other Features” and select Live Events. Now select Enable live streaming. If you have not yet had your own YouTube channel, this is how you can start the process. The next step is choosing the "New live event."
Step 3: You will need to fill in some information before the process can begin. The two choices are Custom or Quick, select the one you want. The latter, as the name implies, will open a recording window immediately, while the former allows for more customizations. When you are ready, choose Go Live Now and the Screenshare.
Step 4: When you are done with the screen record, select Stop Streaming. Now save your video.
Offline Apps For A Professional Needs
There are apps designed to record your screens. They might not be quick, but the customization options they offer are of larger numbers. They are suitable for professionals as well as gaming-centric videos. Here are some of the options to choose from, depend on your budget:
Free App: OBS Studio
OBS Studio can cater to more professional needs, and the best part is, it is free to use. You can have full-screen recording without the app leaving behind watermarks. You can also live stream while recording, which is an excellent option for streamers. The range of support for hardware is wide, and you can have recordings of up to 60 fps.
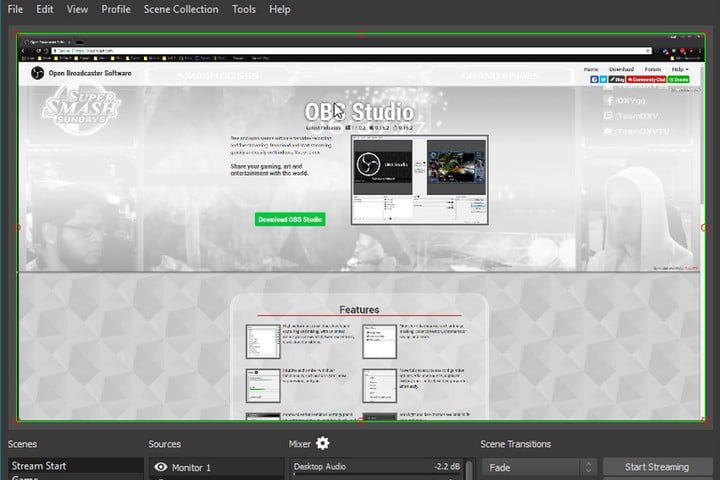
Since the app offers more features than many other free apps, you may have to spend some more time tweaking the settings according to your preferences. Once you have done the adjusting, there is nothing that can stand between you and great screen-recording videos.
Paid App: Snagit
If you have a business and want a quick tool to create your marketing videos, Snagit is just the app you want. However, gamers will find it somewhat insufficient. For startups, vlogs, how-to videos, and the like are made easy with this paid app. If you are having in mind a more complex video consisting of screen recording, graphics, and other kinds of videos, Snagit has everything you need to create one.
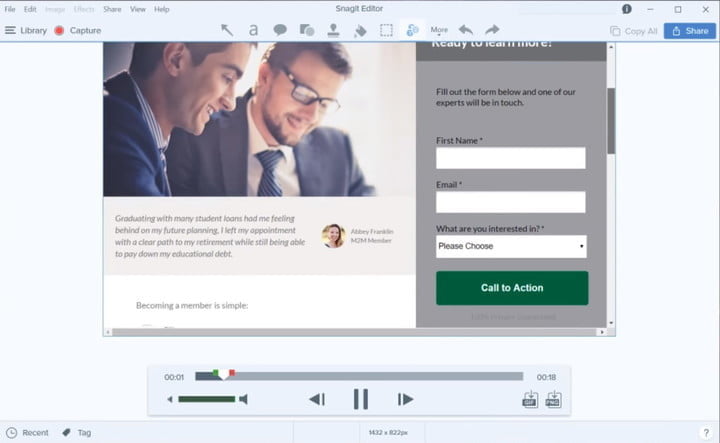
It will cost you $50, but the added features are worth the investment.
Featured Stories

How To - Jul 25, 2025
Savant - Ascent REMIX Free Download (v1.2) - Electrifying Twin-Stick Shooter...

How To - Jul 25, 2025
Way of the Hunter Free Download (v1.23a) - The Ultimate Realistic Hunting...

How To - Jun 12, 2025
The Legend of Tianding Free Download (v1.01) - Become Taiwan's Legendary Outlaw

Features - Jun 11, 2025
Best VPN for PUBG Mobile 2025: Lower Ping & Regional Access Guide

How To - Jun 08, 2025
Telepath Tactics Liberated Free Download (v1.0.57) – The Ultimate Tactical RPG...

How To - Jun 07, 2025
The Mystery of Woolley Mountain Free Download – Whimsical Adventure Game

How To - Jun 07, 2025
We Need to Go Deeper – Complete Edition Free Download (v1.6.5)

How To - Jun 06, 2025
Pharaoh: A New Era Free Download – Build an Ancient Egyptian Empire

How To - Jun 04, 2025
Stardew Valley Free Download (v1.5.6) - Build Your Dream Farm

How To - Jun 04, 2025
Comments
Sort by Newest | Popular