How To Advertise On Instagram Using Facebook Business Manager
SachinSangwan - Oct 08, 2019

In this article, we will show you how you can advertise your brand on Instagram using Facebook Business Manager. Check it out!
- Billion Dollar Blunder: Meta Shuts Down Metaverse After Wasting $80,000,000,000.00
- Permanently Deleting Your Instagram Account: A Complete Step-by-Step Tutorial
- Instagram Launches A Lite Version For Users In Rural And Remote Areas
There are various methods to advertise on Instagram. Some of these provide a lot of options and tools which help you grow your business. So below is the process of how you can create an ad on Instagram using Facebook Ads Manager.
First, connect your Facebook page to Facebook Business Manager
Facebook Ads Manager is the best way to design ads that work on both platforms - Instagram and Facebook. And you can easily make changes in your target audience and other features available for customization, and check how your ads campaign is performing?
If you already have a Facebook Page, here's how to connect your page with the Facebook Business Manager:
- Visit on the website business.facebook.com.
- Click on the 'Create Account' button
- Fill all the required details including your business name, choose your primary Facebook page, as well as your work email address, and other details.
- Next, you'll see an option to add people to Business Manager, if you want, go for it; otherwise, you can skip it.
Once you have connected your page to Facebook Business Manager, you'll be able to run your ads campaign on Instagram.
How to create ads on Instagram
Step 1: Go on your Facebook Business account profile and link it to your Instagram account.
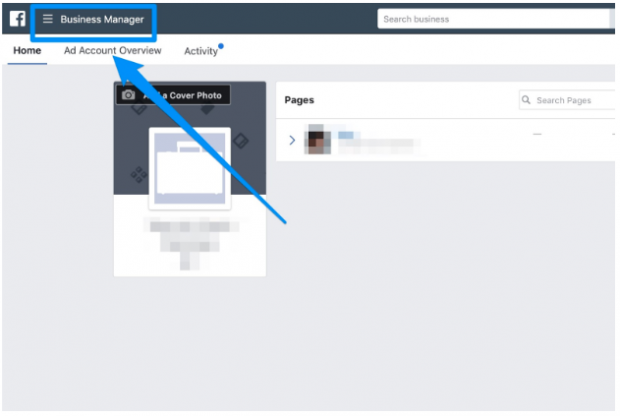
- Open Business Manager and hit the 'Menu' icon.
- Click on Business Settings > Accounts > Instagram Accounts.
- You'll see the +Add button on the top right corner; by clicking the button, you can link to your Insta account.
- Fill all the required details then hit on 'Next.'
Note: If you want to add more Instagram accounts. Click on '+Add' and follow the same procedure mentioned above
Once you have done all the steps, your Instagram profile will be successfully added to your Facebook Business Manager. Now, the next step is creating an Instagram ad.
Step 2: Select your objective
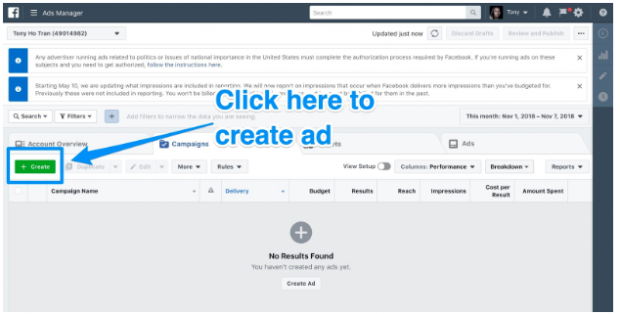
- Firstly, open 'Ads Manager' and hit on '+Create.'
- Now, you will have two options to create a campaign either via "Quick Creation" or "Guided Creation."
These are two types of procedure which help you create a campaign and the differences between the two are below:
- Guided Creation: It includes all steps which are required for managing and creating ads. It is best for beginners who would like more instructions.
- Quick Creation: This gives you more control in creating your Facebook ad, suitable for those with more experience in this work.
The Guided Creation process
Now, you'll see different types of Ad objectives. Choose one based on your preference.
If you want to publish your add on Instagram, you can choose from the list given below:
- Brand awareness - Spreads your business to the unknowns.
- Reach - Displays your ads to the most users possible.
- Traffic - Redirect users to an app store for your application or to your website.
- App installs - Enable people to download the app as they see the ad.
- Engagement - Raises likes, shares, comments, offer claims and event responses.
- Video Views - Raises more views on your video.
- Lead generation - Lets you collect lead data from users that click on your ad.
- Messages - Users will send a message to your brand.
- Conversions - Results in sign-up and sales on your app or website.
- Catalog sales - Shows users advertisements for products on your catalog on Facebook.
- Store visits - Directs users to your off-line stores.
If you can't decide which to choose, you should read the support each of these objectives offers different business goals and find out the most suitable one for yours.
Once you've decided on your objective, you'll be redirected to a page where you need to fill the name of your campaign.
Note: By default, the campaign's name will be the same as your objective; you can easily change it by clicking on the title.
Step 3: Choose your target audience
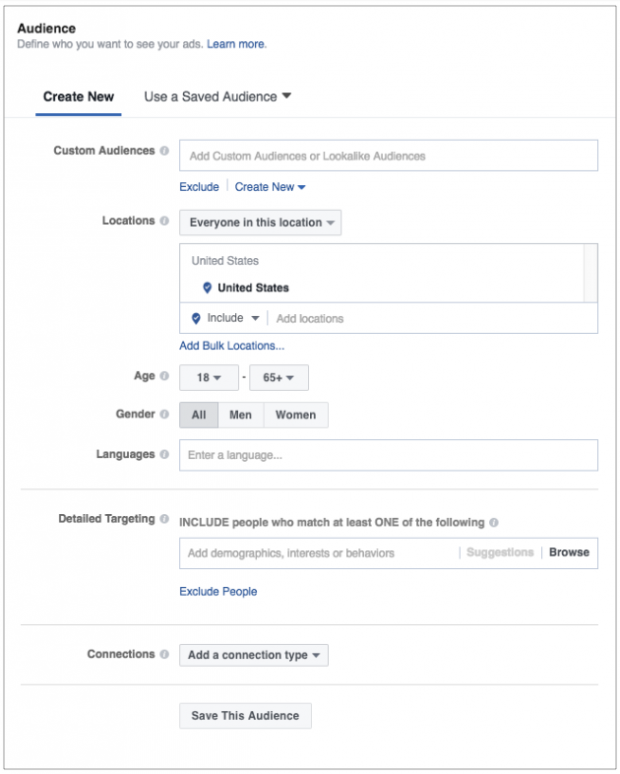
The third step is basically choosing your audience. Whom you want to show your ads to?
Facebook Ad Manager offers lots of different types of audience targeting options that run beyond typical demographic info like gender, age, and location. And another option is also available; you can decide your audience by whether they have:
- "Engaged with your content"
- "Visited your website"
- "Follow a specific Facebook group or page"
- "Downloaded your app"
- "Watched your videos"
- "Subscribed to your newsletter"
This helps you to message and craft copy, that uniquely applies to your potential customers.
Step 4: Choose Ad placements
The Placements section is where you choose the place your ads will be displayed on Instagram and Facebook. there are two options for you:
- Automatic Placements: Facebook said:

- Edit Placements: You can manually choose where your ad will be shown. For example, if you want to show your ads only on Instagram Stories, you should go for the 'Edit Placement' option.
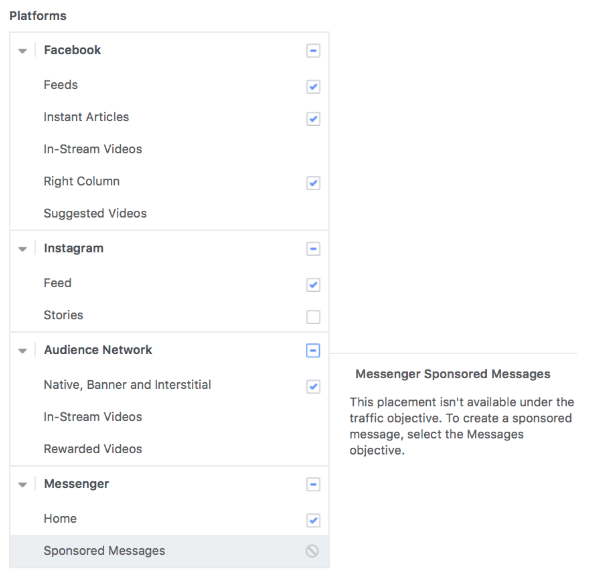
Note: You only have an option of mobile devices to show your ad on Instagram.
After deciding the placement for your ad, it is time for deciding the budget for your campaign.
Step 5: Select budget and schedule
In this step, you'll mainly determine your budget and time duration for the ad. You have many options such as Daily Budget for a max daily spend or Lifetime Budget, and you can also select to run your ads either at certain times of the day or continuously.
It's best to start with CPC, cost per link, on Instagram. This is diverse based on your audience demographics as well as when you run your ads.
Note: It costs you the most to run ads on Instagram on Sundays.
Here, Facebook Ads Manager offers Bid strategy and Optimization options, which let you know how your money will be spent. These can be customized, depending on your Ad goals. When these options are adjusted, in the column on your right, you will see the Estimated Daily Reach scale that shows the number of people that your ads can reach each day.
Step 6: Create ads
Finally, at this step, you need to create an actual ad for your product or service. Firstly, you have to choose the Facebook page that you want to associate with your ad.
Note: Facebook does not allow you to create a campaign without a Facebook page.
Next, you need to decide the format of your ad out of these ones.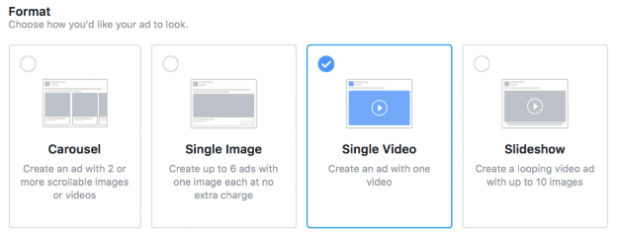
Follow these next steps:
- Pick your videos or pictures
- Craft your ad copy
- Choose an option for payment
- Review the ad
- Confirm
Facebook Ads Manager also shows some technical ads format requirements as you choose your image or video. You also have an option for a Call-to-action button as well as a destination URL that users will reach when they tap on it.
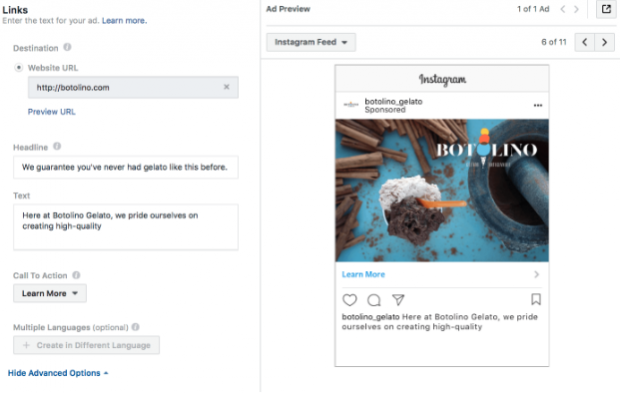
If you want to track your ad through a Facebook pixel on your web or an app event. These help you to give enough information regarding your ad, such as how people interact with your brand after clicking the ad.
Finally, click on the 'Confirm' button.
Congrats! You have created your first ad.
Featured Stories

How To - Mar 04, 2026
Getting Started with AI: A Newbie's Simple Guide

Features - Jun 11, 2025
Best VPN for PUBG Mobile 2025: Lower Ping & Regional Access Guide

How To - Jun 04, 2025
What is a VPN? Your Complete Guide to Safe Virtual Private Networks

How To - May 29, 2025
Receive Buffers And Other Tips To Improve Your Internet Connection

How To - May 21, 2025
How to unlock a disabled iPhone: a step-by-step guide

How To - Mar 31, 2025
Elevate Your Online Presence: Partnering with a Small Business Digital Marketing...

How To - Aug 03, 2023
What is the Yo-Yo test in Indian Cricket?

How To - Jul 10, 2023
Top 7 Stats Sites Every Cricket Fan Must Know

How To - Apr 27, 2023
How much does it cost to start an online casino in 2023

Review - Oct 17, 2022
Betting on Sports Events in the Fairplay App
Read more

ICT News- Jul 29, 2026
The RAM Crisis: Graphics cards shoot up in prices again
Until memory production capacity catches up, graphics cards are likely to remain more expensive than many enthusiasts hoped.
Comments
Sort by Newest | Popular