How To Add AdSense To Your Website And Earn Money With 7 Steps
SachinSangwan - Aug 31, 2019

Are you spending too much time and effort designing, updating your site without getting paid? You can now monetize the site by adding Google AdSense.
- Google's Project Toscana: Elevating Pixel Face Unlock to Rival Apple's Face ID
- Google Offers Voluntary Buyouts to US Employees Amid AI Push
- Google SynthID: Everything You Need to Know About AI Content Detection
Are you spending too much time and effort designing, updating your site without getting paid? That's about to change because you can now monetize the site by adding Google AdSense.
What actually is Google AdSense?
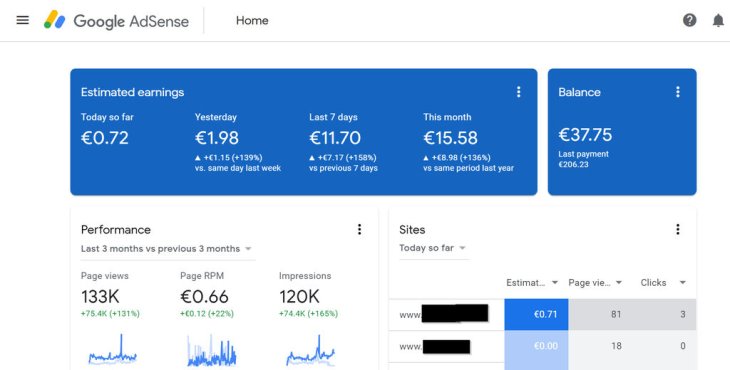
It is basically an advertising network which is run by Google. It is a way to earn money by letting Google show targeted ads on your websites. There are various shapes and sizes of ads. Your website can show text, videos, pictures as well as interactive advertisements as a monetization strategy.

Not only is this free, but you also don't have to deal with advertisers yourself, the platform will do everything for you. So no worries about money collection and maintaining relationships while hosting advertisements. It is definitely a hassle-free and a very easy methodology to earn by promoting advertisements on the website, which functions very smoothly.
Guideline to add the Google AdSense to your site
Step 1: Set up the website
The first and foremost condition is that you must have a real website. AdSense can not be applied to a hypothetical or future website. For the users who are creating a new site or a landing page, finish that first.
Step 2: Ensure that the website is under compliance
This program is not simply open for any site. There are some eligibility requirements for your site to be considered.
AdSense does not work with those publishers who sell counterfeit goods. A publisher in the AdSense program is not allowed to get traffic from certain sources, like unsolicited emails or paid-to-click programs.
Google has its own responsibilities to fulfill. No business wants its advertisements associated with certain types of sites. The tech giant is responsible for reviewing content on your site before accepting it into the program. The following are examples of content not allowed on pages running Google ads:
- Shocking Content
- Adware or Malware
- Illegal practices
- Adult or mature content
- Drugs or drug paraphernalia
- Excessive profanity
- Hateful content, any sort of discrimination on any basis such as race, religion, nationality, gender, sexual orientation, etc.
- Sales of tobacco, weapons, prescription drugs, ammunition or alcohol.
Before applying, confirm that the website complies with the guidelines. Otherwise, the application will get rejected. The entry to this program would be prohibited.
Step 3: Go and apply for the AdSense account

Once your site is up and running, it's time to apply to AdSense.
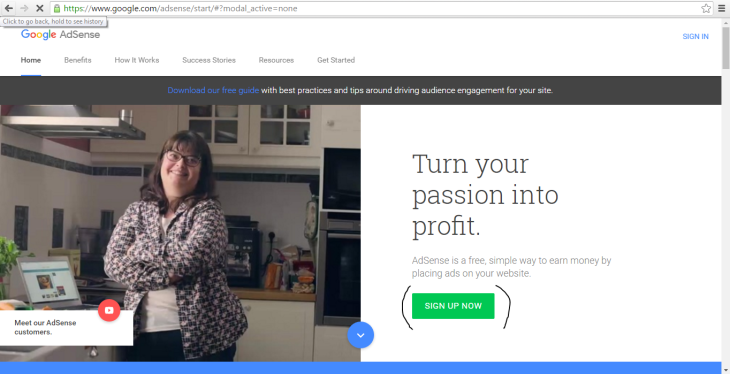
- Firstly, open the official Google AdSense site.
- Now, to begin the application process, find and click on Sign Up Now.
Step 4: Configure the advertisements
Now, decide on the types of ads you cannot display on your site.

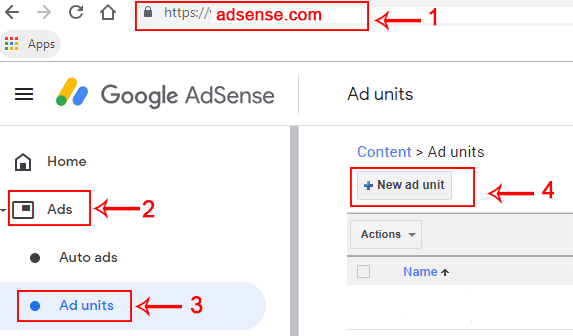
- Search for Content on the dashboard's left side.
- On clicking Content, a drop-down box consists of additional options will show up.
- Now, click on the Ad Units menu.
- Here, select the things such as ad type, style, size, and all other features associated with the advertising space which advertisers will bid for.
While selecting the size, you should choose among the options which Google recommend which are based on the most used sizes by advertisers. As style is wehre you control the way ads appear on your website and you should choose something matching with the color scheme on your site.
Step 5: Copy, paste AdSense code on the website

- When configuring the advertisements is done, scroll down till you reach the page bottom.
- Click on the button "Save and get code."
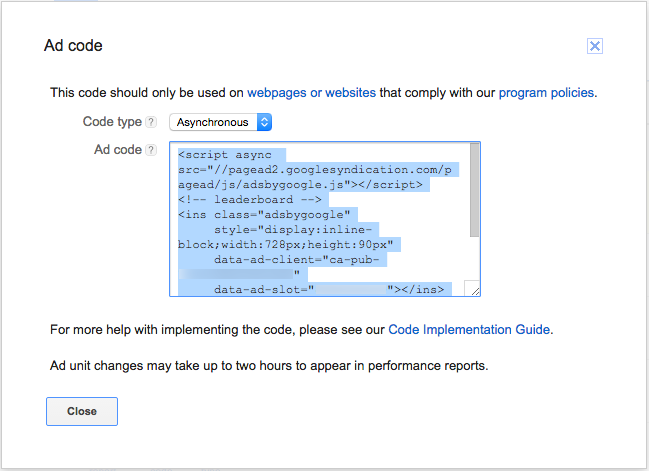
- Now Google generates code automatically for adding to the website. Then, copy and paste the code to your site, which you can do with widgets if you use WordPress.
- Visit Appearance from the administrative dashboard and then find Widgets.
- Paste the URL. Now drag the code and drop it into widget area you want it to be shown on the site.
Step 6: Update the privacy policy
Once AdSense has been enabled, add a privacy policy on the website. This informs visitors that an advertisement network is showing advertisements on the website.
Step 7: Verify the address
Google will send you a card via mail as soon as you start to get earnings from AdSense. Before withdrawing the earnings, verify your address. The card includes a PIN which is associated with the AdSense account. Follow the guidelines or instructions mentioned on the card to verify the PIN online.
Best practices for Google Adsense
Now, as you are done with AdSense installation on the website, you need to make sure that you are doing everything to get the best out of being a publisher. You should be aware of the do's and don'ts while using AdSense. These tips reduce the chances of Google's policies violation and help you in earning more money.
- You and your family members cannot click on the ads displayed on your site.
- Never display advertisements on your e-commerce website.
- Run various ad units.
Here you go. Using these seven simple steps, you can easily add Google AdSense to your site. There are so many other networks providing ads. But Google AdSense is the most reliable and reputable network, and as it is available for free, why not give it a shot? After all, there's no harm in trying.
Featured Stories

How To - Jul 25, 2025
Savant - Ascent REMIX Free Download (v1.2) - Electrifying Twin-Stick Shooter...

How To - Jul 25, 2025
Way of the Hunter Free Download (v1.23a) - The Ultimate Realistic Hunting...

How To - Jun 12, 2025
The Legend of Tianding Free Download (v1.01) - Become Taiwan's Legendary Outlaw

Features - Jun 11, 2025
Best VPN for PUBG Mobile 2025: Lower Ping & Regional Access Guide

How To - Jun 08, 2025
Telepath Tactics Liberated Free Download (v1.0.57) – The Ultimate Tactical RPG...

How To - Jun 07, 2025
The Mystery of Woolley Mountain Free Download – Whimsical Adventure Game

How To - Jun 07, 2025
We Need to Go Deeper – Complete Edition Free Download (v1.6.5)

How To - Jun 06, 2025
Pharaoh: A New Era Free Download – Build an Ancient Egyptian Empire

How To - Jun 04, 2025
Stardew Valley Free Download (v1.5.6) - Build Your Dream Farm

How To - Jun 04, 2025
RoboCop: Rogue City Free Download (v1.0.1.7 & ALL DLC) - Become the Legendary...
Read more

ICT News- Feb 18, 2026
Google's Project Toscana: Elevating Pixel Face Unlock to Rival Apple's Face ID
As the smartphone landscape evolves, Google's push toward superior face unlock technology underscores its ambition to close the gap with Apple in user security and convenience.

ICT News- Feb 19, 2026
Escalating Costs for NVIDIA RTX 50 Series GPUs: RTX 5090 Tops $5,000, RTX 5060 Ti Closes in on RTX 5070 Pricing
As the RTX 50 series continues to push boundaries in gaming and AI, these price trends raise questions about accessibility for average gamers.

Mobile- Feb 17, 2026
Anticipating the Samsung Galaxy S26 and S26+: Key Rumors and Specs
The Samsung Galaxy S26 series is on the horizon, sparking excitement among tech enthusiasts.
Comments
Sort by Newest | Popular