What Should You Do If Your Mac Is Running Slowly?
Viswamitra Jayavant - Oct 03, 2019

What should you do if your Mac slows down your work? Here are some steps to fix it.
- Your Mac's Mouse Disappears, How To Get It Back
- After 6 Months Of Waiting, Big Sur Is Finally Here, Available Starting November 12
- Mac Mini Launched With Apple M1 Chip, Starting At $699
No matter if you’re the average Windows, Mac, or Linux user, there’s one question that anyone who owns a computer asks on the Internet quite often: “Why is my computer so slow? And how do I fix it anyway to make it run faster?”
A slowed computer is quite problematic: Struggling with it for quite a while before I was able to get a completely new laptop, I understand perfectly. It will not only be an annoyance when you’re trying to consume media and have a good time, but it’s also going to be a huge problem when you’re trying to work, and your computer took ten minutes just booting up.

Now, it's time to find out a way to make your Mac run more quickly.
Go For An Upgrade
This advice seems laughable for Mac users. It can easily be said for a Windows user, but for Mac? Not so much. Unless you have very advanced technical skills, and to be frank, if you were, you wouldn’t be here.

The first thing you should consider once your Mac starts to visible slow down is whether it’s time for an upgrade since the hardware had gone bad or outdated. What you ought to look out the most is the RAM number: For older machines typically equipped with 4GB of RAM, it’s time to shoot for 8GB as a standard for good performance. Some users keep their Macs for about a decade, so this scenario isn’t very too science fiction.
You can know all about this by going to the System Information screen (Just use Spotlight - typically hot-keyed as ‘Command ⌘ + Space’ - and search “System Information”). Look under the Memory section.
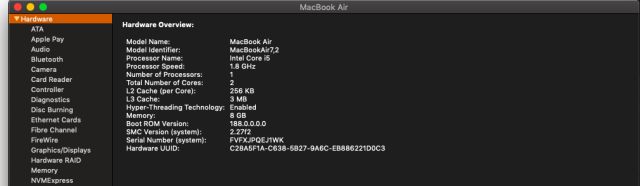
Also write down your Mac’s Model Identifier, Processor Name, and Processor Speed. If you realize that you have a meager 4GB of RAM, go online and see if you can upgrade the machine. The thing is that Apple in recent years had cracked down on user upgradability by soldering virtually every component that on other computers is swappable to the board. That’s why I said unless you have advanced technical skills, chances are, you wouldn’t be able to do it alone.
Don’t take it as a challenge, you’d just break your computer.
There are many sites online that can give you a clue whether you’d be able to upgrade the computer yourself. Try OWC’s ‘My Upgrades’ tool. There you would be able to find whether your computer can be upgraded, and which component can, such as memory.
Typically, if you have a Mac that is older than 2012, just pop open the back panel and go to town. They were made in an age where Apple still respects user upgradability and went out of their way to make the job easier.
As a footnote, if you just so happen to find yourself having an HDD (Hard Disk Drive), an upgrade is in order. Only older models (Thus, easier to upgrade) use HDD, and SSD (Solid State Drive) offers a staggering performance upgrade over HDD. I’ve seen the contrast between HDD and SSD performance before, and believe me, the performance will be visible even to the untrained eyes. A swap between HDD and SSD is a must for any computer if it even wants to have a chance at smoother operation.
Thermal Issues
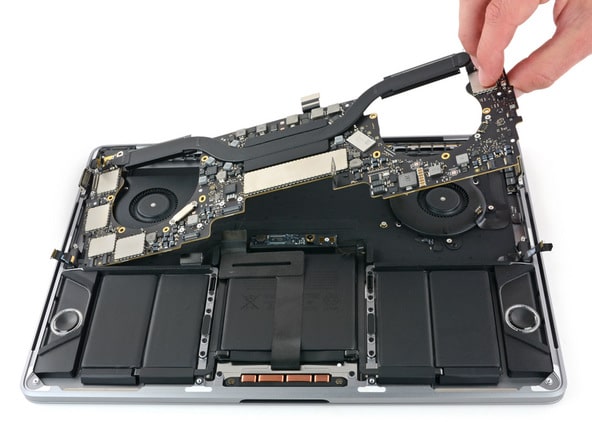
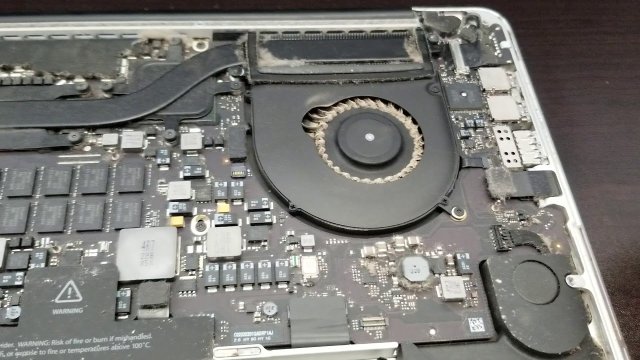
If you have been using your computer non-stop several years, it’d get really dirty inside with gunks, dust, and who-knows-what. This can lead to thermal issues as they block up the cooling fans. The amateur move is to simply check the vents (Underneath the screen’s hinge and to the two sides for some models), they’re quite discrete so make sure to check every nooks and cranny. But if you’re more skilled, just pop the back panel and clean out every part you can touch without breaking the computer (Re-applying the thermal paste, cleaning the internal fans, etc.)
How About The Software?
If you think that the hardware is pretty good, then turn to MacOS as a source of your woe - it’s the last place to look, after all. First and foremost, see if you’re running the latest version of macOS. The official ‘latest’ at the moment is macOS Mojave (10.14.6). Go to your System Preferences and into Software Update to check the version and download any update if you’re prompted to. At now, the newest accessible version of macOS is Catalina, but it’s yet to be released fully to the public and is still in the beta stage.
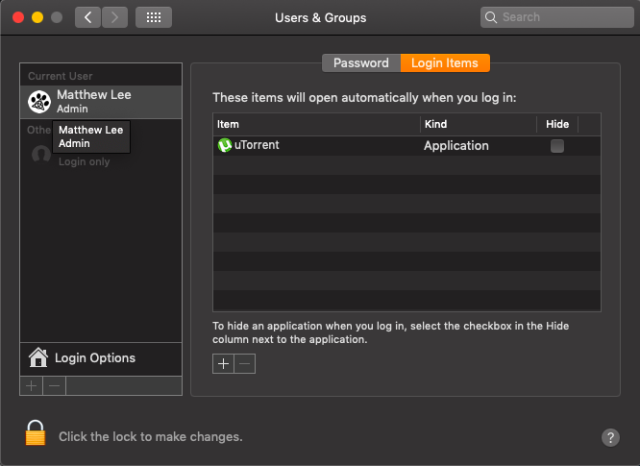
Secondly, check what apps that run alongside MacOS via System Preferences -> Users & Groups. Find Login Items, and if you see there are too many apps that you don’t actually use, try to delete some off the list.
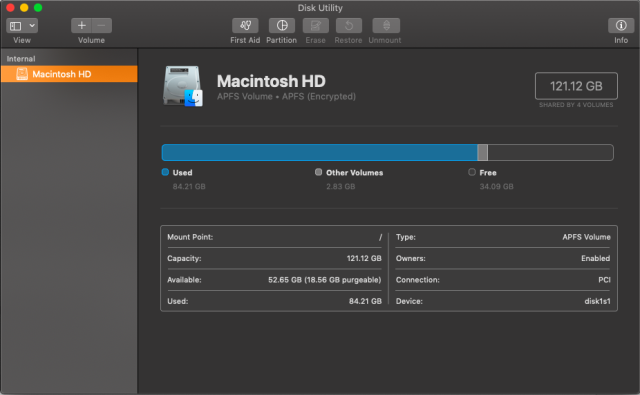
Thirdly, try and find if there are any anomalies in the disk drive that could cause your computer to slow down. You can do this via the Disk Utility app (Use Spotlight to find the app, it’s the quickest way). In the app, search for the First Aid option, in there, diagnose and patch any errors you could find.
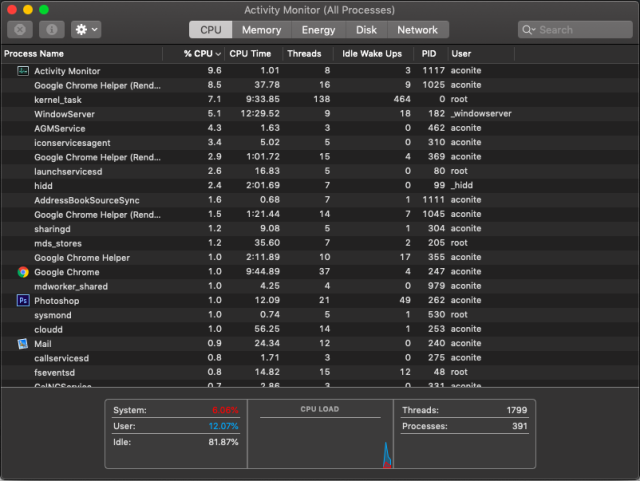
Though there’s a pretty low chance of this actually working, use Spotlight to access Activity Monitor and see if there are any running processes that are tying down your computer. See if there’s anything out of place (A random process that takes up a large percentage of CPU or memory usage). Something that’s using 75% of your CPU processing power is definitely out of the blue. If you’re sure that it shouldn’t behave like that, try to uninstall or reinstall the app.
Re-Install MacOS
Here’s the last-ditch effort and I don’t recommend taking this course of action at all unless you’re very desperate: Re-install macOS from scratch. Although it may sound a little bit imposing and difficult, it’s actually quite simple. If you really need your computer to work in as short a time as possible, this might be your last saving grace.
But before you go ahead and reinstall your machine, make sure that all of the important data on your computer is back up. Through Time Machine, iCloud, Drive, or any type of storage - cloud or physical - that you could think of. Even an external hard drive or a USB stick would do if they hold enough capacity. You don’t need to copy and paste everything, just the most critical like important documents, media, and resources you will need on a new computer that you have yet to upload to the cloud or too large for it to be viable.
If you want to re-install all of your apps and you’re forgetful, take a screenshot or whip out your phone and take photos of your Launchpad’s arrangement. If you have any advanced settings such as VPN, take photos of them, too.
When you’re absolutely sure that you’re ready, restart your Mac and hold down Command ⌘ + R to boot into Recovery Mode. You will be given an option to install the latest OS that had been installed on the computer previously. But if you want an upgrade instead of a roll-back, hold Option key + Command ⌘ + R key instead.
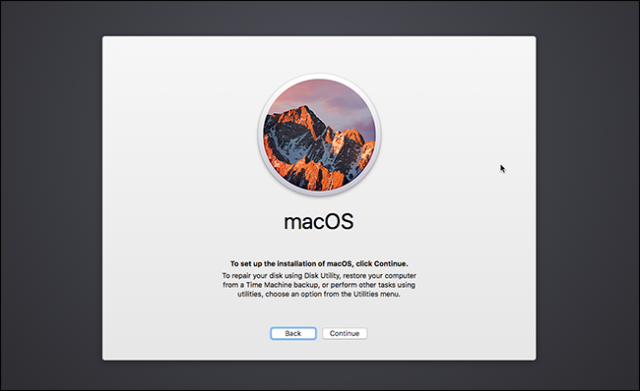
Just press the ‘Reinstall macOS’ option. Whatever prompts that popup, just go along with them and wait out the process. When you have finished, go through the initialization process similar to when you’ve just picked up your computer. Then just proceed to re-install everything and reset all of the settings like you did back then.
Maybe you’d find your computer a little bit faster. But if you see no visible improvements, maybe it’s time for a completely new Mac.
Featured Stories

How To - Aug 03, 2023
What is the Yo-Yo test in Indian Cricket?

How To - Jul 10, 2023
Top 7 Stats Sites Every Cricket Fan Must Know

How To - Apr 27, 2023
How much does it cost to start an online casino in 2023

Review - Oct 17, 2022
Betting on Sports Events in the Fairplay App

How To - Oct 07, 2022
How to Run a Turnkey Casino Business in 2022?

Mobile - Aug 25, 2022
Beginners' Guide for Online Gambling in India 2022

Review - Jul 26, 2022
Roisea Crypto Exchange: Review from Experts

Review - Jul 15, 2022
WHY BETTING SIGNUP OFFERS ARE IMPORTANT FOR NEW GAMBLERS

Review - Jul 06, 2022
Fairplay club in India

Mobile - Jul 05, 2022
Comments
Sort by Newest | Popular